Guide
Convert 70 C to Fahrenheit: Easy Formula and Tips

Temperature plays a crucial role in our daily lives, influencing everything from the weather we experience to the food we cook. But have you ever found yourself puzzled over temperature scales? If you’ve ever wondered what 70 C to Fahrenheit, you’re not alone. This conversion can be tricky for many people who switch between metric and imperial systems. Fear not! In this post, we’ll unravel the mystery of temperature conversion and equip you with the knowledge needed to tackle any Celsius or Fahrenheit challenge that comes your way. Let’s dive into understanding how these two scales work together and why knowing how to convert them matters so much!
About Fahrenheit and Celsius
Fahrenheit and Celsius are two of the most commonly used temperature scales worldwide. Created by Daniel Gabriel Fahrenheit in 1724, the Fahrenheit scale is primarily used in the United States and a few Caribbean nations. Water freezes at 32 degrees Fahrenheit and boils at 212 degrees, creating a range that some find intuitive for daily use.
Celsius, on the other hand, was developed by Anders Celsius in 1742. This scale is based on the freezing and boiling points of water as well but uses different reference points: water freezes at 0 degrees Celsius and boils at 100 degrees. This makes it particularly popular among scientists and countries using the metric system.
Understanding these differences can help when converting between temperatures or discussing weather conditions globally. For example, many people traveling from one region to another need to quickly convert temperatures for cooking or clothing decisions.
Both scales have their own advantages depending on context. Whether you’re measuring room temperature or cooking up a storm, knowing how they relate can be incredibly useful.
Celsius to Fahrenheit Conversion
Understanding how to convert 70 C to Fahrenheit is a handy skill. Whether you are cooking, traveling, or studying weather patterns, knowing the equivalent temperature can make things easier.
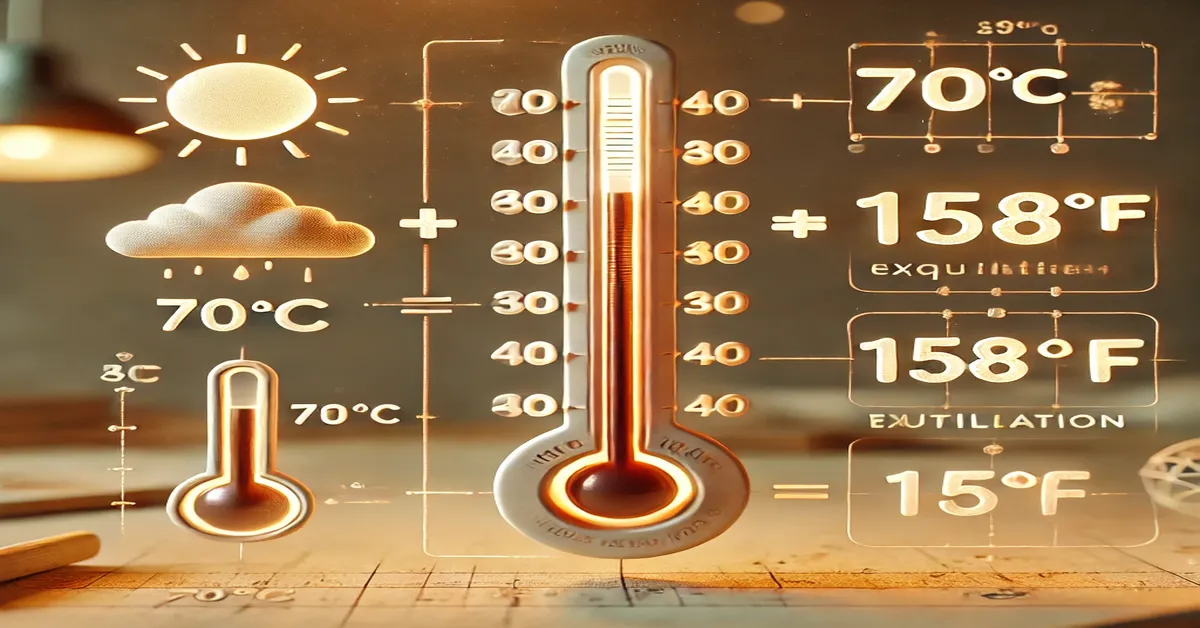
The conversion formula is straightforward: multiply the Celsius value by 1.8 and then add 32. For example, when converting 70 Celsius, you would first multiply it by 1.8 to get 126. Adding 32 gives you a final result of 158 Fahrenheit.
This method works for any temperature in Celsius that you want to convert into Fahrenheit. It’s useful not just in everyday life but also in scientific contexts where precise measurements matter.
If you’re looking for quick conversions without doing math yourself, many online calculators simplify this process significantly. You simply input your desired Celsius value and instantly receive its Fahrenheit equivalent—no need for manual calculations!
Temperature Conversion Formula and Calculator: Celsius to Fahrenheit
Temperature conversion can be quite handy, especially when dealing with recipes or travel plans. To convert 70 C to Fahrenheit, you can use a straightforward formula: multiply the Celsius temperature by 9/5 and then add 32.
For example, if you’re converting 70 C to Fahrenheit, the calculation would go like this: \(70 \times \frac{9}{5} + 32\). This results in an easy-to-calculate temperature of 158 degrees Fahrenheit.
Many online calculators make this process even simpler. Just enter your Celsius value, hit ‘convert,’ and voilà! You get the equivalent temperature in Fahrenheit instantly. These tools are perfect for anyone who frequently needs quick conversions.
Whether you’re baking cookies that require specific temperatures or planning your next vacation destination based on climate conditions, understanding how to convert between these scales is essential. Don’t let measurement differences trip you up; embrace them with confidence!
Conversion Calculators
Conversion calculators are essential tools for anyone dealing with temperature measurements. They simplify the process of converting Celsius to Fahrenheit and vice versa, making it quick and easy to find accurate values. With just a few clicks, you can eliminate the hassle of manual calculations.
Many conversion calculators are available online for free. These user-friendly platforms often require you only to input your desired temperature in either scale. Within seconds, you’ll receive an instant conversion result that saves both time and effort.
Some advanced calculators even allow users to convert multiple temperatures at once or compute conversions across other measurement scales such as length or weight. This versatility makes them popular among students, professionals, and anyone needing accuracy in their work.
Mobile apps also provide convenient options for on-the-go conversions. Whether you’re in the kitchen following a recipe or checking weather forecasts while traveling, having a reliable calculator at your fingertips enhances efficiency in everyday tasks.
Understanding Temperature 70 C to Fahrenheit
Temperature is a fascinating concept that affects our environment and daily activities. When it comes to measuring heat, two primary scales come into play: Celsius and Fahrenheit. Each scale has its own unique characteristics and applications.
When converting 70 C to Fahrenheit, the result is an impressive 158 degrees. This transformation involves a simple formula that takes the Celsius temperature, multiplies it by 1.8, and adds 32. Understanding this conversion can be incredibly helpful when you’re traveling or working with different scientific data.
Celsius is commonly used around the world, especially in regions that have adopted the metric system. In contrast, Fahrenheit is primarily utilized in the United States for everyday purposes like weather forecasting and cooking temperatures.
Whether you’re planning a recipe or checking weather reports while traveling abroad, knowing how to convert between these two scales enhances your understanding of temperature dynamics in various contexts.
The Temperature Conversion Formula
Understanding the temperature conversion formula is essential when navigating between Celsius and Fahrenheit. The relationship can be expressed with a straightforward equation: F = (C × 9/5) + 32. Here, “F” represents Fahrenheit, while “C” stands for Celsius.
To convert from Celsius to Fahrenheit using this formula, simply multiply the Celsius temperature by nine-fifths or 1.8. After obtaining that number, add 32 to complete the transformation into Fahrenheit. For instance, if you’re converting 70 degrees Celsius, you would first calculate \(70 × 9/5\), which equals 126.
Next comes the addition of 32: \(126 + 32 = 158\). Thus, you find your answer—70 degrees Celsius translates to an impressive 158 degrees Fahrenheit.
This formula not only provides accuracy but also serves as a handy tool in various fields like cooking and science. By mastering it, you’ll gain confidence every time you need to tackle temperature conversions efficiently.
70 C to Fahrenheit Solution
When converting temperatures, clarity is key. For those wondering about 70 C to Fahrenheit, the answer is straightforward: it equates to 158 degrees. Understanding this relationship can simplify many everyday tasks, from cooking to scientific experiments.
This conversion is often crucial for people who work internationally or with diverse temperature scales. Many recipes are designed using Fahrenheit measurements, especially in the United States. So knowing that 70 Celsius translates to a warm and inviting 158 Fahrenheit can save time and effort.
It’s fascinating how different regions use various units of measurement. While Celsius focuses on water’s freezing and boiling points—0°C and 100°C respectively—Fahrenheit divides its scale differently. This difference highlights cultural variations in our approach to weather, cooking, and more.
Remembering key conversions like this one can help bridge gaps between different systems. Whether you’re adjusting a recipe or analyzing data across borders, mastering these figures makes life easier.
Solved Example on Temperature Conversion
Converting temperatures can sometimes feel tricky, but it’s easier than you might think. Let’s walk through a simple example to solidify your understanding of the Celsius to Fahrenheit conversion process.
Imagine we want to convert 70 C to Fahrenheit. The formula for this transformation is straightforward: multiply the Celsius temperature by 9/5 and then add 32. It sounds complicated, but it really isn’t!
First, take 70 and multiply it by 9/5 or simply (1.8). You’ll get 126. Next, add 32 to that number. So, when you do the math—126 + 32—you arrive at a final result of 158 degrees Fahrenheit.
This method not only applies to our specific case but can be used with any Celsius value you’re curious about converting! With just these steps in mind, you’ll master temperature conversions effortlessly.
Experiences to Share
Temperature conversion can be a fascinating journey for many. I remember my first experience with Celsius and Fahrenheit conversions during a science project in school. It was eye-opening to realize how different systems reflect our understanding of temperature.
Traveling abroad often brings about interesting stories related to temperature. One summer, I ventured to Europe where temperatures were consistently measured in Celsius. Struggling with the unfamiliar scale made me appreciate how essential it is to know both systems.
Then there are cooking adventures that require precise measurements. A recipe called for 70 degrees Celsius, which initially stumped me until I converted it into Fahrenheit—158 degrees! That moment sparked an interest in mastering temperature conversions more effectively.
Even simple daily experiences can illustrate the importance of knowing these two scales. Whether you’re checking the weather or adjusting your thermostat, being comfortable converting between Celsius and Fahrenheit adds ease to everyday life.
Homework Support and Resources
Homework can sometimes feel overwhelming, especially when it involves temperature conversions like 70 C to Fahrenheit. Fortunately, there are numerous resources available to help you navigate these challenges effectively.
Online platforms offer interactive tools that simplify the conversion process. Websites and apps dedicated to science and mathematics often feature built-in calculators specifically for temperature conversion. These tools allow you to input values quickly, providing instant results without any manual calculations.
For those who prefer a more hands-on approach, textbooks and study guides focusing on basic math principles can be invaluable. They often include sections dedicated to unit conversions with step-by-step examples that enhance understanding.
Additionally, engaging in study groups or forums can provide personalized support from peers who may have faced similar hurdles. Sharing experiences and solutions not only reinforces your knowledge but also makes learning about temperatures both enjoyable and effective.
Conclusion
Understanding temperature conversions is essential in our daily lives, whether for cooking, traveling, or scientific experiments. When considering 70 Celsius to Fahrenheit, it’s clear that this conversion plays a vital role in various contexts. Knowing that 70 degrees Celsius equals 158 degrees Fahrenheit can help you make informed decisions about heat-related activities.
With the right tools and formulas at your disposal, converting between these units becomes an effortless task. Resources like online calculators and simple equations are invaluable for anyone looking to master temperature conversions.
As we navigate through different climates or cook up delicious recipes requiring precise temperatures, understanding how to convert Celsius to Fahrenheit will enhance your experience. Embracing this knowledge opens doors to more accurate measurements across diverse fields.
Stay curious about temperature! The world of conversions is fascinating and ever-relevant. Whether you’re studying physics or baking a cake, mastering these concepts can lead to rewarding outcomes and greater accuracy in whatever you pursue.
Guide
Hair Transplant Cost: Pricing, Factors & Affordable Options

Hair transplants have become a popular solution for hair loss, offering a permanent and natural-looking restoration. But one of the most common concerns is the cost of a hair transplant. The price varies significantly based on location, clinic reputation, and procedure type. In this guide, we will break down hair transplant costs, key influencing factors, and tips to save money without compromising quality.
How Much Does a Hair Transplant Cost?
The hair transplant cost typically ranges from $4,000 to $15,000 in the United States. However, prices can vary widely based on several factors, including the technique used, the number of grafts required, and the surgeon’s expertise.
General Cost Breakdown:
- Small Procedure (1,000 grafts): $3,000 – $6,000
- Medium Procedure (2,000 grafts): $5,000 – $10,000
- Large Procedure (3,000+ grafts): $8,000 – $15,000
Since hair transplants are considered cosmetic procedures, most health insurance plans do not cover them. Patients must pay out-of-pocket or explore financing options.
Factors Affecting Hair Transplant Cost
Several factors determine the final cost of a hair transplant:
1. Type of Procedure
FUE (Follicular Unit Extraction) tends to be more expensive than FUT (Follicular Unit Transplantation) due to its labor-intensive nature.
2. Number of Grafts Needed
The more grafts required, the higher the cost. A small area may need 1,000 grafts, while extensive baldness might require 3,000+ grafts.
3. Surgeon’s Expertise
Highly experienced surgeons charge premium rates for their skills and success rates.
4. Clinic Location
Hair transplant costs vary depending on the country and city. Turkey and India offer affordable options, while the U.S. and U.K. are more expensive.
5. Additional Costs
Medications, post-procedure care, and follow-up visits can add to the total expense.
Types of Hair Transplant Procedures and Their Costs
There are different hair transplant techniques, each with varying price points.
1. Follicular Unit Transplantation (FUT) – $4,000 to $10,000
- Also known as the strip method.
- Involves removing a strip of scalp and transplanting follicles.
- More affordable but leaves a visible scar.
2. Follicular Unit Extraction (FUE) – $6,000 to $15,000
- Individual hair follicles are extracted and transplanted.
- Minimally invasive, with no linear scar.
- Preferred for natural-looking results.
3. Direct Hair Implantation (DHI) – $6,000 to $16,000
- A more advanced version of FUE.
- Offers precise control over hair direction and placement.
- Higher cost due to advanced technology.
4. Robotic Hair Transplants – $8,000 to $18,000
- Utilizes AI-powered robotic assistance for accuracy.
- More expensive due to the cost of technology.
Hair Transplant Cost by Country
Here’s a look at the average hair transplant cost in different parts of the world:
Country | Cost Range (USD) |
---|---|
USA | $4,000 – $15,000 |
UK | $5,000 – $12,000 |
Canada | $4,000 – $14,000 |
Turkey | $1,500 – $4,000 |
India | $1,000 – $3,500 |
Thailand | $2,500 – $6,000 |
Mexico | $2,500 – $6,000 |
Turkey and India are the most affordable, attracting medical tourists worldwide for cost-effective yet high-quality procedures.
Is a Hair Transplant Worth the Cost?
A hair transplant is a long-term investment in self-confidence and appearance. Consider the following benefits:
Pros:
✔ Permanent hair restoration. ✔ Natural-looking results. ✔ No need for ongoing treatments. ✔ Boosts self-esteem and confidence.
Cons:
❌ High initial cost. ❌ Requires 6-12 months for full results. ❌ Possible side effects like swelling and scarring.
For many, the psychological and aesthetic benefits outweigh the cost, making it a worthwhile procedure.
How to Save Money on a Hair Transplant
If you’re looking for a cost-effective hair transplant, here are some tips:
- Compare Clinics & Surgeons – Research multiple clinics and read real patient reviews.
- Consider Medical Tourism – Traveling to Turkey or India can cut costs by 50-70%.
- Opt for FUT Instead of FUE – If scarring isn’t a concern, FUT is cheaper.
- Look for Discounts & Payment Plans – Some clinics offer zero-interest financing.
- Join Clinical Trials – Some research centers offer free or low-cost transplants.
Conclusion
The hair transplant cost varies based on location, technique, and surgeon expertise. While it can be expensive, it offers a permanent solution to hair loss. If you’re considering the procedure, be sure to research clinics, compare prices, and explore financing options.
Frequently Asked Questions (FAQ)
1. Is a hair transplant covered by insurance?
No, hair transplants are considered cosmetic procedures, so insurance typically does not cover them.
2. How long does a hair transplant last?
A successful hair transplant can last a lifetime, though some may need touch-ups over time.
3. Can I finance my hair transplant?
Yes, many clinics offer payment plans and financing options.
4. How soon will I see results?
Initial hair growth starts in 3-4 months, with full results visible after 6-12 months.
5. Are there risks involved?
Common risks include temporary swelling, scarring, and shock loss, but they usually subside within weeks.
Would you consider getting a hair transplant? Share your thoughts below! 💬
Guide
Board and Batten Siding: Durable & Stylish Exterior Choice

Board and batten siding has been a popular choice for centuries, offering a timeless aesthetic that blends rustic charm with modern appeal. Whether used in farmhouses, cottages, or contemporary homes, this vertical siding style is known for its durability, energy efficiency, and ease of maintenance.
In this guide, we’ll explore the advantages, materials, installation process, maintenance tips, and cost considerations of board and batten siding. If you’re considering a home exterior upgrade, read on to discover why this siding style might be the perfect fit for you.
What is Board and Batten Siding?
Board and batten siding is a type of vertical siding that consists of wide boards with narrow battens covering the seams between them. This style originated in North America as a practical and efficient way to create weather-tight exteriors.
Key Features:
- Vertical installation with alternating wide and narrow strips.
- Provides a rustic yet elegant aesthetic.
- Used in traditional and modern home designs.
Benefits of Board and Batten Siding
Choosing board and batten siding comes with several advantages that make it a top choice for homeowners:
1. Durability
Board and batten siding is built to withstand harsh weather conditions, including strong winds, heavy rains, and snow.
2. Energy Efficiency
The overlapping boards create an extra layer of insulation, improving a home’s energy efficiency and reducing heating and cooling costs.
3. Versatile Design Appeal
It complements various architectural styles, from classic farmhouses to sleek contemporary homes.
4. Increased Home Value
Installing board and batten siding can enhance your home’s curb appeal and resale value.
5. Low Maintenance
Depending on the material chosen, it requires minimal upkeep compared to other siding options.
Types of Materials for Board and Batten Siding
When selecting board and batten siding, choosing the right material is essential. Here are the most popular options:
1. Wood
- Provides a natural, classic look.
- Requires sealing and regular maintenance to prevent rot and insect damage.
- Popular wood types: cedar, pine, redwood.
2. Vinyl
- Affordable and low-maintenance.
- Resistant to moisture, warping, and insects.
- Available in various colors and finishes.
3. Fiber Cement
- Highly durable and resistant to fire, pests, and extreme weather.
- Mimics the appearance of real wood without high maintenance.
- Costs more than vinyl but lasts longer.
4. Metal (Steel or Aluminum)
- Modern, sleek aesthetic with high durability.
- Resistant to fire, rot, and pests.
- Can be more expensive than other materials.
5. Engineered Wood
- A cost-effective alternative to natural wood.
- Treated to resist moisture and pests.
- Requires occasional repainting or sealing.
How to Install Board and Batten Siding
While hiring a professional is recommended, DIY enthusiasts can install board and batten siding with the right tools and careful planning.
Materials Needed:
- Boards and battens
- Nails or screws
- Measuring tape and level
- Saw and hammer
- Weather-resistant barrier
Step-by-Step Installation Process:
Step 1: Prepare the Surface
Ensure the exterior wall is clean, dry, and covered with a weather-resistant barrier.
Step 2: Install the Boards
Attach the wide boards vertically, leaving a small gap for expansion.
Step 3: Add the Battens
Nail the narrow battens over the seams between the boards.
Step 4: Secure and Seal
Use weather-resistant nails and seal any gaps to prevent moisture penetration.
Step 5: Apply Finish
Depending on the material, apply paint or sealant to enhance durability.
Board and Batten Siding vs. Other Siding Options
Feature | Board and Batten | Vinyl Siding | Brick | Stucco |
---|---|---|---|---|
Durability | High | Moderate | Very High | High |
Maintenance | Low-Moderate | Very Low | Low | Moderate |
Aesthetic Appeal | Rustic & Modern | Simple Look | Traditional | Mediterranean |
Cost | Moderate | Low | High | Moderate-High |
Installation Complexity | Moderate | Easy | Complex | Complex |
Cost Considerations
The cost of board and batten siding varies based on materials, labor, and location.
Estimated Costs:
- Wood: $3 – $10 per sq. ft.
- Vinyl: $2 – $7 per sq. ft.
- Fiber Cement: $4 – $9 per sq. ft.
- Metal: $5 – $12 per sq. ft.
Installation costs typically range between $2,000 – $15,000, depending on the size of the home and labor expenses.
Maintenance and Longevity
Proper maintenance ensures longevity and lasting appeal. Follow these tips to keep your siding in top shape:
- Regular Cleaning: Wash with mild soap and water to remove dirt and debris.
- Inspect for Damage: Check for cracks, warping, or pests.
- Repaint or Seal: Repaint wood siding every 5-7 years.
- Check for Moisture Issues: Ensure water does not seep behind the boards.
Common Design Ideas and Styles
- Modern Farmhouse: White or neutral board and batten paired with black trim.
- Rustic Cabin: Natural wood siding with earthy tones.
- Contemporary Homes: Dark-colored fiber cement board and batten for a sleek look.
- Classic Cottage: Pastel-colored vinyl siding for a charming appeal.
Conclusion
Board and batten siding is a versatile, stylish, and durable choice for homeowners looking to upgrade their exterior. With various material options, easy maintenance, and an appealing aesthetic, it remains a top choice in modern home design.
FAQ Section
1. Is board and batten siding waterproof?
No, but when installed properly with a weather-resistant barrier, it provides excellent protection against moisture.
2. How long does board and batten siding last?
Depending on the material, it can last between 20 to 50+ years with proper maintenance.
3. Can I install board and batten siding myself?
Yes, but it requires proper tools and preparation. Hiring a professional ensures optimal results.
4. What is the best material for board and batten siding?
For durability and low maintenance, fiber cement and vinyl are the top choices.
5. Does board and batten siding increase home value?
Yes, it enhances curb appeal and can increase resale value due to its aesthetic and durability.
If you’re ready to transform your home’s exterior, consider board and batten siding for a timeless and elegant look!
Guide
Middle Earth Map: Exploring Tolkien’s Legendary World

J.R.R. Tolkien’s Middle earth is one of the most detailed and immersive fantasy worlds ever created. The Middle earth map is not just a backdrop for epic tales but a living, breathing world filled with diverse landscapes, rich histories, and legendary locations. From the peaceful Shire to the fiery depths of Mount Doom, every corner of this map plays a crucial role in The Lord of the Rings, The Hobbit, and other Tolkien works.
In this in-depth guide, we’ll explore the geography, regions, and significance of the Middle earth map, helping both fans and newcomers understand its depth and complexity.
The Origins of the Middle-earth Map
Tolkien was meticulous in world-building, creating detailed maps that helped him track the journeys of his characters. The first sketches of Middle earth appeared in the early drafts of The Hobbit and later evolved into the highly detailed maps seen in The Lord of the Rings.
Key Contributors to the Middle-earth Map:
- J.R.R. Tolkien – Hand-drew the original sketches.
- Christopher Tolkien – His son refined and published detailed maps.
- Pauline Baynes – Created the iconic illustrated map used in many publications.
These maps are more than just navigational tools; they serve as historical records of Tolkien’s world, detailing ancient cities, battle sites, and forgotten realms.
Major Regions of Middle-earth
Middle earth consists of diverse regions, each with its own culture, landscape, and significance in the story.
1. The Shire
- Home to the Hobbits.
- Located in Eriador, northwest of Middle earth.
- Peaceful, agricultural land, largely untouched by war.
2. Rivendell
- The refuge of the Elves, led by Elrond.
- A hidden valley sanctuary east of the Misty Mountains.
- Served as a resting place for Bilbo and Frodo during their journeys.
3. Mirkwood
- Once known as Greenwood the Great.
- Became a dark, dangerous forest due to the presence of Sauron (as the Necromancer).
- Home to giant spiders and the Woodland Realm of the Elves.
4. Rohan
- Also called the Riddermark.
- Known for its vast plains and horsemen, the Rohirrim.
- Its capital, Edoras, houses the Golden Hall of Meduseld.
5. Gondor
- One of the most powerful human kingdoms.
- Home to Minas Tirith, the White City.
- Defended against Sauron’s forces in the War of the Ring.
6. Mordor
- The dark land of Sauron.
- Home to Mount Doom and Barad-dûr.
- A barren, volcanic wasteland symbolizing ultimate evil.
The Role of Geography in Tolkien’s Stories
The Middle earth map is more than a visual reference—it plays an active role in storytelling. Geography dictates character journeys, determines battle strategies, and reflects deeper themes of good vs. evil.
For example:
- The Shire’s isolation represents innocence and peace.
- Mordor’s harsh terrain symbolizes corruption and destruction.
- The Misty Mountains serve as a natural barrier, shaping travel routes.
How the Map Evolved Over Time
Tolkien revised the Middle-earth map multiple times. Early versions were simpler, lacking key locations. Later editions added more details, improving geographical accuracy to support his expanding narrative.
Christopher Tolkien’s The History of Middle earth series provides insights into these changes, showing how geography and storytelling evolved together.
Understanding the Scale of Middle-earth
Many fans wonder: how big is Middle-earth?
- Based on Tolkien’s descriptions, it is roughly the size of Europe.
- The journey from The Shire to Mordor covers around 1,800 miles (2,900 km).
- Travel times vary based on terrain—e.g., crossing the Misty Mountains takes weeks.
This scale adds realism, making the world feel vast and lived-in.
Famous Journeys in Middle-earth
Many iconic journeys take place across Middle earth:
1. The Quest of the Ring (Frodo & Sam)
- Route: The Shire → Rivendell → Rohan → Mordor.
- Covers 1,800 miles over several months.
2. Thorin’s Company (The Hobbit)
- Route: The Shire → Rivendell → Mirkwood → Erebor.
- Includes encounters with trolls, goblins, and Smaug.
3. The Ride of the Rohirrim
- Route: Rohan → Gondor.
- A critical moment in The Return of the King.
Final Thoughts
The Middle-earth map is an essential part of Tolkien’s world-building, shaping the epic journeys and histories of The Lord of the Rings and The Hobbit. Its landscapes, regions, and legends create a rich, immersive fantasy setting that continues to captivate readers and movie fans alike.
If you love Tolkien’s world, studying the Middle-earth map deepens your appreciation for its stories. Share this guide with fellow fans and embark on your own adventure through Middle-earth!
Frequently Asked Questions (FAQs)
1. Is Middle-earth based on real geography?
Yes, Tolkien was inspired by real-world locations, particularly Europe. The Shire resembles rural England, while Mordor reflects volcanic landscapes.
2. How accurate are Tolkien’s maps?
Tolkien’s maps are internally consistent, though they evolved over time. Later editions refined distances and details.
3. Who created the modern versions of Middle-earth maps?
Christopher Tolkien and artists like Pauline Baynes contributed detailed versions used in books and adaptations.
4. Can you visit real-world locations similar to Middle-earth?
Yes! New Zealand, used for the films, offers landscapes resembling Middle-earth.
5. Are there hidden locations on the Middle-earth map?
Yes, places like Undying Lands and Valinor are part of Tolkien’s legendarium but aren’t always depicted on standard maps.
- Business2 months ago
5starsstocks.com Dividend Stocks: Investing with AI Insights
- Lifestyle3 months ago
The //vital-mag.net Blog: A Guide to Holistic Wellness
- Entertainment2 months ago
Showbizztoday.com showbizztoday: Gossip & Entertainment
- Business2 months ago
FintechZoom.com Gold: Gold Investment with Modern Tools
- Business2 months ago
5StarsStocks.com: Guide to Smart and Strategic Investing
- Business2 months ago
FintechZoom DAX40 Insights: Trends, Data, and Strategies
- Technology1 month ago
Rapid URL Indexer: Boost Website Visibility Instantly
- Travel2 months ago
Journeyman Camera:Ultimate Tool for Adventurous Photography