Connect with us

Guide

Granny Square Patterns 101: A Fun & Creative Crochet Guide

Published

on

Granny Square Patterns

If you’ve ever admired a cozy blanket or vibrant throw adorned with delightful squares, then you’ve likely encountered the charm of granny square patterns. These colorful motifs are not just for grandmas; they’re an essential part of crochet culture that appeals to crafters of all ages. Whether you’re a complete beginner or someone looking to sharpen your skills, diving into the world of granny squares is both rewarding and fun.

Granny squares offer endless possibilities for creativity. With just a few basic stitches, you can create beautiful designs that add warmth and personality to your home. The best part? Once you’ve mastered the basics, you’ll find plenty of intricate patterns waiting for you in this beloved craft.

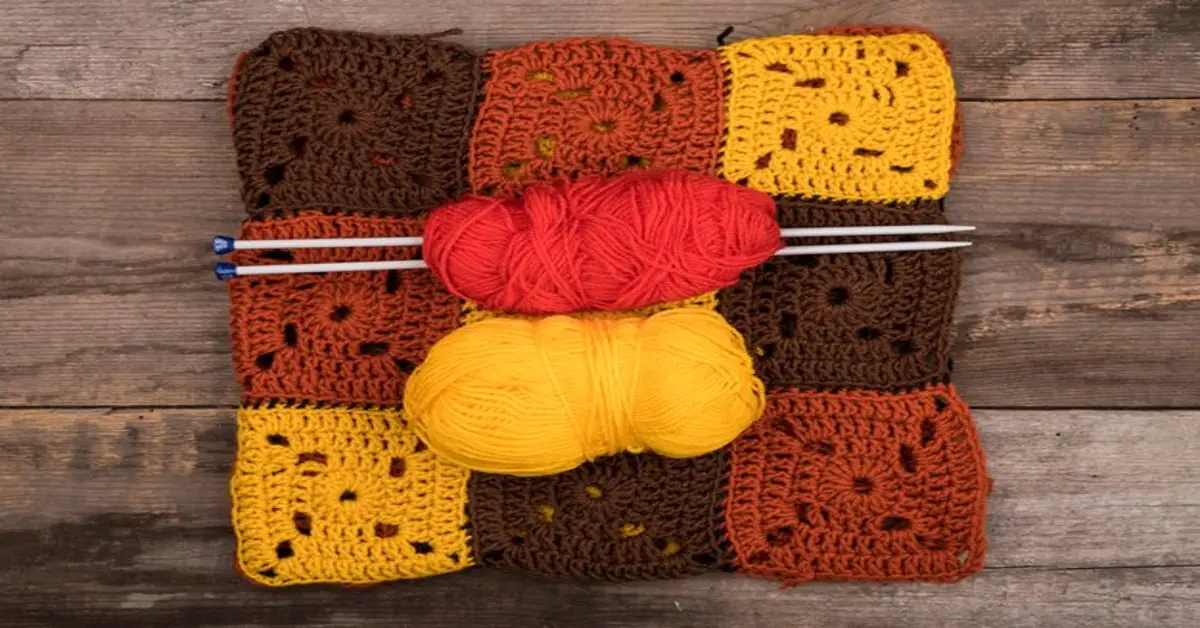
So grab your yarn and hook! Let’s explore everything from getting started with granny square patterns to tips on perfecting your technique. You’re about to embark on an exciting crochet journey filled with color, texture, and loads of inspiration!

Getting Started

Starting your journey with granny square patterns is easier than you might think. The first step is to familiarize yourself with the basic crochet stitches. You’ll primarily use chains, slip stitches, double crochets, and sometimes single crochets. These stitches form the foundation of any granny square pattern.

Next, choose a yarn that speaks to you! Worsted weight yarn is often recommended for beginners due to its versatility and ease of handling. Don’t forget about colors—granny squares are known for their vibrant palettes. Selecting contrasting or complementary hues can make your projects pop.

You’ll also need a crochet hook that suits your chosen yarn. A size H (5 mm) hook works well with worsted weight yarn, but always check the label on your yarn for recommendations. Having stitch markers handy can be helpful too; they assist in keeping track of rounds as you work through each square.

Once you’ve gathered your supplies, it’s time to learn how to create a magic circle, which will give you a solid starting point for most granny squares. This technique eliminates gaps in the center while allowing flexibility in sizing.

Practice makes perfect! Don’t rush through these initial steps; take your time getting comfortable with each stitch before moving on to more complex patterns or designs.

Essential Supplies

To start your journey with granny square patterns, gathering the right supplies is essential. First on the list is yarn. Choose a medium-weight yarn for ease of use and versatility. Cotton yarn offers durability and vibrant colors, while acrylic provides warmth and affordability.

Next, you’ll need crochet hooks. A size H-8 (5mm) hook works well for most worsted weight yarns. However, always check your yarn label for recommended hook sizes to ensure a perfect tension in your stitches.

Scissors are another must-have tool. Invest in a good pair that can easily snip through various types of yarn without fraying them at the ends. Having a reliable pair will save you time during those crafting sessions.

Don’t forget about a tapestry needle! This handy tool helps weave in loose ends after finishing each square, giving your projects that polished look we all strive for when working on our granny squares.

Consider keeping stitch markers nearby to help track rounds or specific stitches within your pattern. They’re especially useful when creating larger projects where it’s easy to lose count or get mixed up with multiple rows of color changes.

Basic Granny Square Patterns

Granny granny square patterns are the foundation of many crochet projects. They’re simple, yet versatile. Understanding basic granny square patterns can open a world of creativity. The classic granny square is made up of just a few stitches: chain, double crochet, and slip stitch.

To begin with the traditional pattern, start by creating a slip knot and chaining four to form a ring. You’ll then work your way around this ring with clusters of double crochets separated by chains. This creates that iconic “flower” center within your square.

Once you’ve mastered the basics, try adding color changes for visual interest. Alternate yarn shades as you go round to create vibrant gradients or bold contrasts between rounds—this adds depth and personality to your squares.

Another popular variation is the solid granny square pattern. Instead of leaving spaces between clusters, fill them in completely for a denser look. Solid squares are perfect when you’re looking for warmth in blankets or sturdy textiles like bags.

Don’t be afraid to explore other designs inspired by traditional motifs! There’s an entire universe out there—from hexagons to triangles—waiting to add flair to your crochet repertoire while keeping it fun and engaging.

Advanced Granny Square Patterns

Once you’ve mastered the basics of granny squares, it’s time to explore advanced patterns that can elevate your crochet game. These intricate designs often incorporate various stitches and techniques, allowing for a rich tapestry of textures and colors.

One popular method is combining multiple squares into one cohesive piece. This not only adds visual interest but also challenges your skills as you learn to join different styles seamlessly. Consider experimenting with motifs like flowers or stars that can be incorporated into larger projects.

Another approach is using color gradients within a single square. By changing yarn colors gradually, you’ll create stunning ombre effects that catch the eye. This technique requires careful planning but results in breathtaking pieces perfect for any project.

Incorporating additional stitches such as bobbles, shells, or popcorns introduces complexity to your work. These textured elements bring depth and dimension to your granny squares, making them stand out even more in a blanket or garment.

Don’t shy away from exploring modern interpretations of granny squares! With innovative designs emerging regularly on platforms like Instagram and Pinterest, there are endless possibilities waiting for you to try them out. Your creativity will truly shine when working with these advanced patterns.

Tips for Perfecting Your Granny Squares

To perfect your granny squares, focus on tension. Maintaining consistent tension is key to achieving a uniform look. If your squares vary in size, it may be time to adjust how tightly or loosely you hold the yarn while crocheting.

Choose the right hook size for your yarn. A hook that’s too small can make stitches tight and difficult to work with, while one that’s too large might create gaps in your square. Refer to the yarn label for guidance but don’t hesitate to experiment until you find what feels comfortable.

Consider using stitch markers as helpful guides when working through complex patterns. They allow you to track where you’re at without losing count of rows or stitches. This practice is especially useful if you’re creating larger pieces that require multiple granny squares.

Pay attention to color placement when designing your pattern. Selecting complementary colors can elevate any project significantly. Don’t shy away from mixing different shades; experimenting will lead you toward unique combinations and striking designs.

Blocking is an important step often overlooked by beginners. Wet-blocking or steam-blocking helps even out imperfections and makes each square lie flat, enhancing its overall appearance before joining them into a larger project.

Common Mistakes to Avoid

When diving into granny square patterns, beginners often stumble over a few common mistakes. One of the most frequent errors is tension inconsistency. Keeping your stitches even is crucial; uneven tension can lead to squares that don’t quite fit together nicely.

Another pitfall is skipping stitch counts in patterns. It’s easy to get lost in the rhythm of crocheting and overlook important instructions. Always count your stitches regularly to ensure that each round maintains its intended shape and size.

Choosing the wrong yarn or hook size can also throw off your project. If you’re using a bulky yarn with a small hook, expect some frustration! Make sure you follow recommendations so your squares turn out as they should.

Many beginners forget about weaving in ends properly after finishing their squares. Leaving loose threads not only affects aesthetics but can also cause unraveling over time. Take the extra moment to secure those pesky tails before moving on.

Rushing through each square may seem tempting, especially when excitement builds for larger projects like blankets or bags. However, taking your time ensures accuracy and quality in every stitch you make—leading to beautiful results you’ll be proud of!

Granny Square Projects for Inspiration

Granny squares are incredibly versatile, making them a perfect choice for various projects. One popular option is to create colorful blankets. You can mix and match different patterns and colors to make a cozy throw that reflects your personality.

Another creative project idea is crafting stylish bags. A granny square bag can be a statement accessory for any outfit. Simply sew together multiple squares or use one large square as the base and add handles for an eye-catching design.

For those looking to decorate their homes, consider making pillows or cushion covers from granny squares. This project allows you to play with textures and shades, adding warmth and charm to your living space while showcasing your crochet skills.

If you’re feeling adventurous, try creating wearable items like shawls or cardigans using granny square designs. These garments not only look trendy but also provide comfort during chilly days while allowing you to express your unique style.

Don’t forget about small decorative pieces! Keychains, coasters, or even wall hangings made from granny squares can add delightful touches throughout your home. These mini-projects are great for practicing techniques while gifting something handmade to friends or family members.

Join the Crochet Community

The world of granny squares is vast and vibrant, filled with creativity and camaraderie. Joining the crochet community can be an enriching experience for both beginners and seasoned crocheters alike. There are countless online forums, social media groups, and local meet-ups where you can connect with others who share your passion.

Participating in these communities not only provides support but also offers a treasure trove of ideas. You’ll find inspiration from other crafters’ unique interpretations of the classic granny square pattern. Sharing photos of your work or seeking feedback on your projects can boost your confidence as well.

Many groups even host challenges or swaps that encourage participation while helping you refine your skills further. Engaging in friendly competitions can keep things exciting and motivate you to try new techniques.

Remember that everyone was once a beginner. Don’t hesitate to ask questions or seek advice; most members will be more than willing to help out someone just starting their journey into crochet. The sense of belonging within these communities makes learning even more enjoyable.

So grab your yarn and hook, jump into discussions, join workshops, or simply browse through beautiful creations shared by fellow enthusiasts! Embrace this opportunity to grow your knowledge while making lasting connections along the way—your next favorite project could just be a conversation away.

Continue Reading
Click to comment

Leave a Reply

Your email address will not be published. Required fields are marked *

Guide

Hair Transplant Cost: Pricing, Factors & Affordable Options

Published

on

Hair Transplant Cost

Hair transplants have become a popular solution for hair loss, offering a permanent and natural-looking restoration. But one of the most common concerns is the cost of a hair transplant. The price varies significantly based on location, clinic reputation, and procedure type. In this guide, we will break down hair transplant costs, key influencing factors, and tips to save money without compromising quality.

How Much Does a Hair Transplant Cost?

The hair transplant cost typically ranges from $4,000 to $15,000 in the United States. However, prices can vary widely based on several factors, including the technique used, the number of grafts required, and the surgeon’s expertise.

General Cost Breakdown:

  • Small Procedure (1,000 grafts): $3,000 – $6,000
  • Medium Procedure (2,000 grafts): $5,000 – $10,000
  • Large Procedure (3,000+ grafts): $8,000 – $15,000

Since hair transplants are considered cosmetic procedures, most health insurance plans do not cover them. Patients must pay out-of-pocket or explore financing options.

Factors Affecting Hair Transplant Cost

Several factors determine the final cost of a hair transplant:

1. Type of Procedure

FUE (Follicular Unit Extraction) tends to be more expensive than FUT (Follicular Unit Transplantation) due to its labor-intensive nature.

2. Number of Grafts Needed

The more grafts required, the higher the cost. A small area may need 1,000 grafts, while extensive baldness might require 3,000+ grafts.

3. Surgeon’s Expertise

Highly experienced surgeons charge premium rates for their skills and success rates.

4. Clinic Location

Hair transplant costs vary depending on the country and city. Turkey and India offer affordable options, while the U.S. and U.K. are more expensive.

5. Additional Costs

Medications, post-procedure care, and follow-up visits can add to the total expense.

Types of Hair Transplant Procedures and Their Costs

There are different hair transplant techniques, each with varying price points.

1. Follicular Unit Transplantation (FUT) – $4,000 to $10,000

  • Also known as the strip method.
  • Involves removing a strip of scalp and transplanting follicles.
  • More affordable but leaves a visible scar.

2. Follicular Unit Extraction (FUE) – $6,000 to $15,000

  • Individual hair follicles are extracted and transplanted.
  • Minimally invasive, with no linear scar.
  • Preferred for natural-looking results.

3. Direct Hair Implantation (DHI) – $6,000 to $16,000

4. Robotic Hair Transplants – $8,000 to $18,000

  • Utilizes AI-powered robotic assistance for accuracy.
  • More expensive due to the cost of technology.

Hair Transplant Cost by Country

Here’s a look at the average hair transplant cost in different parts of the world:

CountryCost Range (USD)
USA$4,000 – $15,000
UK$5,000 – $12,000
Canada$4,000 – $14,000
Turkey$1,500 – $4,000
India$1,000 – $3,500
Thailand$2,500 – $6,000
Mexico$2,500 – $6,000

Turkey and India are the most affordable, attracting medical tourists worldwide for cost-effective yet high-quality procedures.

Is a Hair Transplant Worth the Cost?

A hair transplant is a long-term investment in self-confidence and appearance. Consider the following benefits:

Pros:

✔ Permanent hair restoration. ✔ Natural-looking results. ✔ No need for ongoing treatments. ✔ Boosts self-esteem and confidence.

Cons:

❌ High initial cost. ❌ Requires 6-12 months for full results. ❌ Possible side effects like swelling and scarring.

For many, the psychological and aesthetic benefits outweigh the cost, making it a worthwhile procedure.

How to Save Money on a Hair Transplant

If you’re looking for a cost-effective hair transplant, here are some tips:

  1. Compare Clinics & Surgeons – Research multiple clinics and read real patient reviews.
  2. Consider Medical Tourism – Traveling to Turkey or India can cut costs by 50-70%.
  3. Opt for FUT Instead of FUE – If scarring isn’t a concern, FUT is cheaper.
  4. Look for Discounts & Payment Plans – Some clinics offer zero-interest financing.
  5. Join Clinical Trials – Some research centers offer free or low-cost transplants.

Conclusion

The hair transplant cost varies based on location, technique, and surgeon expertise. While it can be expensive, it offers a permanent solution to hair loss. If you’re considering the procedure, be sure to research clinics, compare prices, and explore financing options.

Frequently Asked Questions (FAQ)

1. Is a hair transplant covered by insurance?

No, hair transplants are considered cosmetic procedures, so insurance typically does not cover them.

2. How long does a hair transplant last?

A successful hair transplant can last a lifetime, though some may need touch-ups over time.

3. Can I finance my hair transplant?

Yes, many clinics offer payment plans and financing options.

4. How soon will I see results?

Initial hair growth starts in 3-4 months, with full results visible after 6-12 months.

5. Are there risks involved?

Common risks include temporary swelling, scarring, and shock loss, but they usually subside within weeks.

Would you consider getting a hair transplant? Share your thoughts below! 💬

Continue Reading

Guide

Board and Batten Siding: Durable & Stylish Exterior Choice

Published

on

Board and Batten Siding

Board and batten siding has been a popular choice for centuries, offering a timeless aesthetic that blends rustic charm with modern appeal. Whether used in farmhouses, cottages, or contemporary homes, this vertical siding style is known for its durability, energy efficiency, and ease of maintenance.

In this guide, we’ll explore the advantages, materials, installation process, maintenance tips, and cost considerations of board and batten siding. If you’re considering a home exterior upgrade, read on to discover why this siding style might be the perfect fit for you.

What is Board and Batten Siding?

Board and batten siding is a type of vertical siding that consists of wide boards with narrow battens covering the seams between them. This style originated in North America as a practical and efficient way to create weather-tight exteriors.

Key Features:

  • Vertical installation with alternating wide and narrow strips.
  • Provides a rustic yet elegant aesthetic.
  • Used in traditional and modern home designs.

Benefits of Board and Batten Siding

Choosing board and batten siding comes with several advantages that make it a top choice for homeowners:

1. Durability

Board and batten siding is built to withstand harsh weather conditions, including strong winds, heavy rains, and snow.

2. Energy Efficiency

The overlapping boards create an extra layer of insulation, improving a home’s energy efficiency and reducing heating and cooling costs.

3. Versatile Design Appeal

It complements various architectural styles, from classic farmhouses to sleek contemporary homes.

4. Increased Home Value

Installing board and batten siding can enhance your home’s curb appeal and resale value.

5. Low Maintenance

Depending on the material chosen, it requires minimal upkeep compared to other siding options.

Types of Materials for Board and Batten Siding

When selecting board and batten siding, choosing the right material is essential. Here are the most popular options:

1. Wood

  • Provides a natural, classic look.
  • Requires sealing and regular maintenance to prevent rot and insect damage.
  • Popular wood types: cedar, pine, redwood.

2. Vinyl

  • Affordable and low-maintenance.
  • Resistant to moisture, warping, and insects.
  • Available in various colors and finishes.

3. Fiber Cement

  • Highly durable and resistant to fire, pests, and extreme weather.
  • Mimics the appearance of real wood without high maintenance.
  • Costs more than vinyl but lasts longer.

4. Metal (Steel or Aluminum)

  • Modern, sleek aesthetic with high durability.
  • Resistant to fire, rot, and pests.
  • Can be more expensive than other materials.

5. Engineered Wood

  • A cost-effective alternative to natural wood.
  • Treated to resist moisture and pests.
  • Requires occasional repainting or sealing.

How to Install Board and Batten Siding

While hiring a professional is recommended, DIY enthusiasts can install board and batten siding with the right tools and careful planning.

Materials Needed:

  • Boards and battens
  • Nails or screws
  • Measuring tape and level
  • Saw and hammer
  • Weather-resistant barrier

Step-by-Step Installation Process:

Step 1: Prepare the Surface

Ensure the exterior wall is clean, dry, and covered with a weather-resistant barrier.

Step 2: Install the Boards

Attach the wide boards vertically, leaving a small gap for expansion.

Step 3: Add the Battens

Nail the narrow battens over the seams between the boards.

Step 4: Secure and Seal

Use weather-resistant nails and seal any gaps to prevent moisture penetration.

Step 5: Apply Finish

Depending on the material, apply paint or sealant to enhance durability.

Board and Batten Siding vs. Other Siding Options

FeatureBoard and BattenVinyl SidingBrickStucco
DurabilityHighModerateVery HighHigh
MaintenanceLow-ModerateVery LowLowModerate
Aesthetic AppealRustic & ModernSimple LookTraditionalMediterranean
CostModerateLowHighModerate-High
Installation ComplexityModerateEasyComplexComplex

Cost Considerations

The cost of board and batten siding varies based on materials, labor, and location.

Estimated Costs:

  • Wood: $3 – $10 per sq. ft.
  • Vinyl: $2 – $7 per sq. ft.
  • Fiber Cement: $4 – $9 per sq. ft.
  • Metal: $5 – $12 per sq. ft.

Installation costs typically range between $2,000 – $15,000, depending on the size of the home and labor expenses.

Maintenance and Longevity

Proper maintenance ensures longevity and lasting appeal. Follow these tips to keep your siding in top shape:

  • Regular Cleaning: Wash with mild soap and water to remove dirt and debris.
  • Inspect for Damage: Check for cracks, warping, or pests.
  • Repaint or Seal: Repaint wood siding every 5-7 years.
  • Check for Moisture Issues: Ensure water does not seep behind the boards.

Common Design Ideas and Styles

  • Modern Farmhouse: White or neutral board and batten paired with black trim.
  • Rustic Cabin: Natural wood siding with earthy tones.
  • Contemporary Homes: Dark-colored fiber cement board and batten for a sleek look.
  • Classic Cottage: Pastel-colored vinyl siding for a charming appeal.

Conclusion

Board and batten siding is a versatile, stylish, and durable choice for homeowners looking to upgrade their exterior. With various material options, easy maintenance, and an appealing aesthetic, it remains a top choice in modern home design.

FAQ Section

1. Is board and batten siding waterproof?

No, but when installed properly with a weather-resistant barrier, it provides excellent protection against moisture.

2. How long does board and batten siding last?

Depending on the material, it can last between 20 to 50+ years with proper maintenance.

3. Can I install board and batten siding myself?

Yes, but it requires proper tools and preparation. Hiring a professional ensures optimal results.

4. What is the best material for board and batten siding?

For durability and low maintenance, fiber cement and vinyl are the top choices.

5. Does board and batten siding increase home value?

Yes, it enhances curb appeal and can increase resale value due to its aesthetic and durability.

If you’re ready to transform your home’s exterior, consider board and batten siding for a timeless and elegant look!

Continue Reading

Guide

Middle Earth Map: Exploring Tolkien’s Legendary World

Published

on

Middle Earth

J.R.R. Tolkien’s Middle earth is one of the most detailed and immersive fantasy worlds ever created. The Middle earth map is not just a backdrop for epic tales but a living, breathing world filled with diverse landscapes, rich histories, and legendary locations. From the peaceful Shire to the fiery depths of Mount Doom, every corner of this map plays a crucial role in The Lord of the Rings, The Hobbit, and other Tolkien works.

In this in-depth guide, we’ll explore the geography, regions, and significance of the Middle earth map, helping both fans and newcomers understand its depth and complexity.

The Origins of the Middle-earth Map

Tolkien was meticulous in world-building, creating detailed maps that helped him track the journeys of his characters. The first sketches of Middle earth appeared in the early drafts of The Hobbit and later evolved into the highly detailed maps seen in The Lord of the Rings.

Key Contributors to the Middle-earth Map:

  • J.R.R. Tolkien – Hand-drew the original sketches.
  • Christopher Tolkien – His son refined and published detailed maps.
  • Pauline Baynes – Created the iconic illustrated map used in many publications.

These maps are more than just navigational tools; they serve as historical records of Tolkien’s world, detailing ancient cities, battle sites, and forgotten realms.

Major Regions of Middle-earth

Middle earth consists of diverse regions, each with its own culture, landscape, and significance in the story.

1. The Shire

  • Home to the Hobbits.
  • Located in Eriador, northwest of Middle earth.
  • Peaceful, agricultural land, largely untouched by war.

2. Rivendell

  • The refuge of the Elves, led by Elrond.
  • A hidden valley sanctuary east of the Misty Mountains.
  • Served as a resting place for Bilbo and Frodo during their journeys.

3. Mirkwood

  • Once known as Greenwood the Great.
  • Became a dark, dangerous forest due to the presence of Sauron (as the Necromancer).
  • Home to giant spiders and the Woodland Realm of the Elves.

4. Rohan

  • Also called the Riddermark.
  • Known for its vast plains and horsemen, the Rohirrim.
  • Its capital, Edoras, houses the Golden Hall of Meduseld.

5. Gondor

  • One of the most powerful human kingdoms.
  • Home to Minas Tirith, the White City.
  • Defended against Sauron’s forces in the War of the Ring.

6. Mordor

  • The dark land of Sauron.
  • Home to Mount Doom and Barad-dûr.
  • A barren, volcanic wasteland symbolizing ultimate evil.

The Role of Geography in Tolkien’s Stories

The Middle earth map is more than a visual reference—it plays an active role in storytelling. Geography dictates character journeys, determines battle strategies, and reflects deeper themes of good vs. evil.

For example:

  • The Shire’s isolation represents innocence and peace.
  • Mordor’s harsh terrain symbolizes corruption and destruction.
  • The Misty Mountains serve as a natural barrier, shaping travel routes.

How the Map Evolved Over Time

Tolkien revised the Middle-earth map multiple times. Early versions were simpler, lacking key locations. Later editions added more details, improving geographical accuracy to support his expanding narrative.

Christopher Tolkien’s The History of Middle earth series provides insights into these changes, showing how geography and storytelling evolved together.

Understanding the Scale of Middle-earth

Many fans wonder: how big is Middle-earth?

  • Based on Tolkien’s descriptions, it is roughly the size of Europe.
  • The journey from The Shire to Mordor covers around 1,800 miles (2,900 km).
  • Travel times vary based on terrain—e.g., crossing the Misty Mountains takes weeks.

This scale adds realism, making the world feel vast and lived-in.

Famous Journeys in Middle-earth

Many iconic journeys take place across Middle earth:

1. The Quest of the Ring (Frodo & Sam)

  • Route: The Shire → Rivendell → Rohan → Mordor.
  • Covers 1,800 miles over several months.

2. Thorin’s Company (The Hobbit)

  • Route: The Shire → Rivendell → Mirkwood → Erebor.
  • Includes encounters with trolls, goblins, and Smaug.

3. The Ride of the Rohirrim

  • Route: Rohan → Gondor.
  • A critical moment in The Return of the King.

Final Thoughts

The Middle-earth map is an essential part of Tolkien’s world-building, shaping the epic journeys and histories of The Lord of the Rings and The Hobbit. Its landscapes, regions, and legends create a rich, immersive fantasy setting that continues to captivate readers and movie fans alike.

If you love Tolkien’s world, studying the Middle-earth map deepens your appreciation for its stories. Share this guide with fellow fans and embark on your own adventure through Middle-earth!

Frequently Asked Questions (FAQs)

1. Is Middle-earth based on real geography?

Yes, Tolkien was inspired by real-world locations, particularly Europe. The Shire resembles rural England, while Mordor reflects volcanic landscapes.

2. How accurate are Tolkien’s maps?

Tolkien’s maps are internally consistent, though they evolved over time. Later editions refined distances and details.

3. Who created the modern versions of Middle-earth maps?

Christopher Tolkien and artists like Pauline Baynes contributed detailed versions used in books and adaptations.

4. Can you visit real-world locations similar to Middle-earth?

Yes! New Zealand, used for the films, offers landscapes resembling Middle-earth.

5. Are there hidden locations on the Middle-earth map?

Yes, places like Undying Lands and Valinor are part of Tolkien’s legendarium but aren’t always depicted on standard maps.

Continue Reading

Trending