Connect with us

Fashion

Forward Helix Piercing Guide: Stylish Ear Art & Care Tips

Published

on

Forward Helix Piercing

If you’re on the hunt for a striking way to express your individuality, look no further than the forward helix piercing. This trendy ear adornment has taken the body art world by storm, offering a unique twist that sets it apart from traditional lobe piercings. Nestled in the upper cartilage of your ear, this piercing not only adds flair but also opens up endless possibilities for stylish jewelry options. Whether you’re considering your first piercing or expanding an existing collection, understanding what makes forward helix piercings so special is essential. Let’s dive into everything you need to know about this fashionable choice!

Understanding Forward Helix Piercing

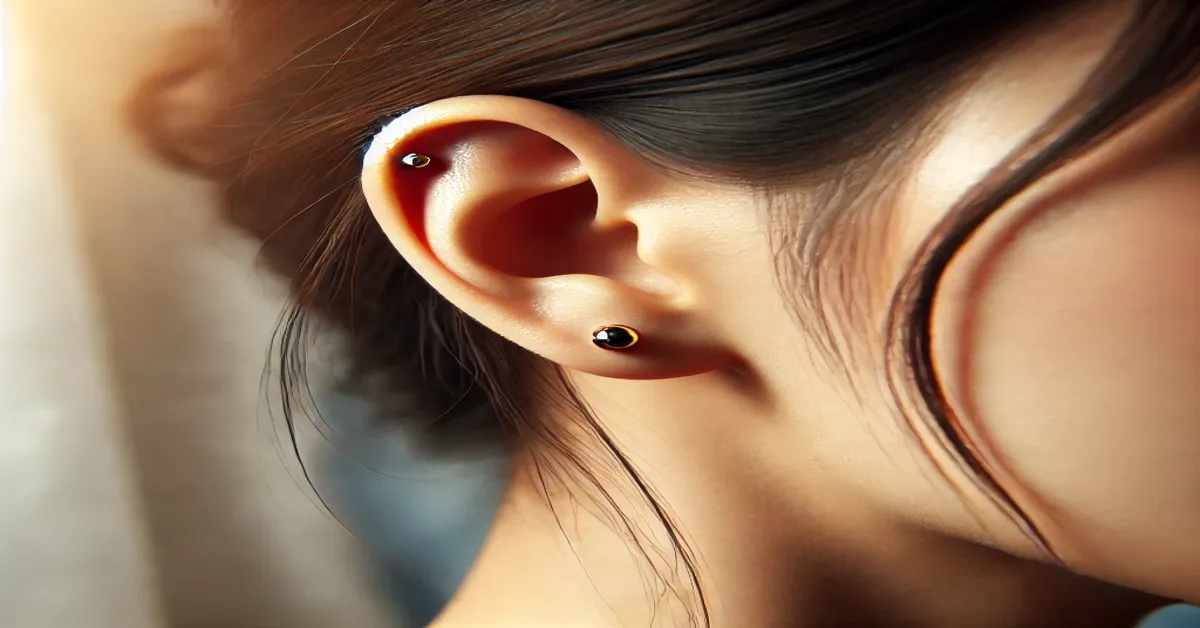
The forward helix piercing is located on the upper cartilage of your ear, specifically at the front. This unique placement allows for a stylish statement while maintaining an air of subtlety. It’s perfect for those who want to showcase their personality without going overboard.

With its growing popularity, the forward helix has become a canvas for creativity. You can mix and match different jewelry styles and materials, making it a standout feature in your overall look. It’s not just about aesthetics; it’s also about expressing who you are through body art.

What is a Forward Helix Piercing?

A forward helix piercing is a trendy ear adornment located on the upper cartilage, just in front of the outer rim. It offers a unique twist to standard lobe piercings and adds an extra layer of personality to your look.

This type of piercing can be styled with various jewelry options, from simple studs to elaborate hoops. Many people choose it for its versatility and the opportunity it provides for creative expression through different designs and materials.

Pain and Healing Process

Getting a forward helix piercing can cause some discomfort, but pain levels vary from person to person. The initial prick often feels like a quick pinch, followed by a dull ache that fades quickly. Many find the experience manageable with minimal discomfort.

Healing typically takes six to twelve weeks. During this period, it’s essential to keep the area clean and avoid touching it unnecessarily. Swelling might occur initially, which is normal. Be patient and gentle during your healing journey for the best results with your new ear art.

Cost Considerations

When considering a forward helix piercing, cost is an important factor. The price typically ranges from $30 to $100, depending on the studio’s reputation and location. Higher-end shops may charge more due to their experience and quality of service.

Additionally, remember that you’ll need to factor in jewelry costs. High-quality materials like titanium or gold can increase expenses. It’s also wise to budget for aftercare products, as proper maintenance is vital for healing your new piercing effectively. Investing wisely ensures a smooth process and stunning results.

Preparing for Your Forward Helix Piercing

Before getting a forward helix piercing, take some time to research and choose a reputable piercer. Look for someone with experience in cartilage piercings specifically. Reading reviews and checking their portfolio can help ensure you’re in good hands.

On the day of your appointment, wear comfortable clothing that allows easy access to your ear. It’s also wise to eat beforehand; this can help stabilize your blood sugar levels during the process. Stay hydrated and avoid alcohol or blood-thinning medications leading up to your piercing for optimal results.

READ MORE:Celebrity Movie Archive: Celebrate Cinema’s Iconic Moments

What to Know Before Getting Pierced

Before getting your forward helix piercing, it’s essential to choose a reputable piercer. Look for someone with experience and positive reviews. A clean and professional environment is crucial for your safety.

Consider your lifestyle as well. If you play contact sports or have an active job, this may not be the best time for a new piercing. Be prepared to commit to aftercare routines, as healing can take several months. Check any jewelry allergies beforehand to ensure compatibility with the materials used in your chosen earrings.

The Process and Aftercare

Getting a forward helix piercing involves a skilled professional using a sterile needle. They’ll mark the spot and quickly pierce through the upper cartilage of your ear. It takes just moments, but the experience can vary from person to person based on pain tolerance.

Aftercare is crucial for healing. Keep the area clean by gently washing it with saline solution or an antibacterial soap. Avoid touching or twisting the jewelry, as this can lead to irritation or infection. Regularly check for signs of healing and follow your piercer’s specific aftercare instructions for best results.

Performing the Piercing

When getting a forward helix piercing, the process typically starts with a consultation. The piercer will assess your ear and discuss placement options based on your preferences and anatomy. A clean environment is crucial, so ensure the studio follows strict hygiene practices.

Once you’re ready, the piercer will mark the spot for accuracy before using a sterilized needle to create the hole. This method minimizes trauma compared to other techniques. Afterward, they’ll insert your chosen jewelry while explaining how to care for it during recovery.

Aftercare Instructions

After getting your forward helix piercing, proper aftercare is crucial for a smooth healing process. Keep the area clean by gently washing it with saline solution or mild soap twice daily. Avoid touching or twisting the jewelry, as this can lead to irritation and infection.

It’s important to avoid swimming pools, hot tubs, and direct sunlight during the initial healing phase. Maintaining a consistent aftercare routine will help minimize discomfort and promote faster healing. Remember to be patient; your new piercing needs time to settle in while you enjoy its unique beauty!

Cleaning the Forward Helix Piercing

Cleaning your forward helix piercing is crucial for preventing infections. Use saline solution or a gentle saline rinse to keep the area clean. Avoid alcohol-based products, as they can irritate your skin.

Gently wipe around the piercing with a cotton swab soaked in the solution. Do this twice daily for optimal care. Remember not to twist or turn your jewelry during cleaning; this could cause trauma and delay healing. Always wash your hands before touching the area to minimize bacteria exposure.

READ MORE:Curly Hair Men:Hairstyles and Tips for Every Occasion

Jewelry Selection and Care

Selecting the right jewelry for your forward helix piercing is crucial. Opt for pieces that are specifically designed for cartilage piercings, as they offer the best fit and comfort. Materials like surgical steel, titanium, or gold are great choices due to their hypoallergenic properties.

Once you’ve chosen your jewelry, proper care is essential. Regularly clean your accessories with a gentle saline solution to prevent irritation. Avoid changing out your jewelry too soon; let your piercing fully heal first to ensure a smooth transition when you decide to switch styles.

Types of Jewelry for a Forward Helix Piercing

When choosing jewelry for a forward helix piercing, options abound. Studs are popular due to their sleek appearance and comfort. Many opt for tiny gems or decorative balls that add a touch of sparkle without being overwhelming.

Hoops and huggies can also make a bold statement. They offer an edgy look while providing versatility in styling. No matter your choice, ensure the jewelry fits snugly but comfortably to avoid irritation as it heals.

Jewelry Materials

When selecting jewelry for your forward helix piercing, the material matters. Common choices include surgical stainless steel, titanium, and gold. Surgical stainless steel is hypoallergenic and durable, making it a popular option for initial piercings.

Titanium is another great choice due to its lightweight nature and resistance to corrosion. For those seeking a touch of luxury, solid gold or gold plating can add elegance. Always ensure that any jewelry used is specifically designed for body piercings to minimize irritation and promote healing during the early stages post-piercing.

Changing Out Your Jewelry

Changing out your jewelry in a forward helix piercing can be an exciting way to express your style. It’s essential to wait until the piercing has fully healed, which usually takes about 3 to 6 months. Patience is key here; rushing the process can lead to irritation or infection.

When switching jewelry, opt for high-quality materials like titanium or surgical steel. These are less likely to cause allergic reactions and help maintain ear health. Always ensure your hands are clean before touching the jewelry, and handle everything gently during the change.

Potential Side Effects and Risks

Getting a forward helix piercing comes with certain risks. Infection is one of the most common issues, especially if aftercare instructions aren’t followed carefully. Symptoms can include redness, swelling, or discharge.

Another potential side effect is keloid formation—a raised scar that can develop around the piercing site. Allergic reactions to jewelry materials are also possible, particularly with nickel. Being aware of these possibilities helps you make informed decisions about your new ear art and ensures you take proper precautions throughout the healing process.

Conclusion

A forward helix piercing offers a stylish way to express individuality through ear art. With its unique placement and versatility, it stands out in the world of body modifications. Understanding the pain levels, healing process, and proper aftercare can make your experience enjoyable.

Choosing the right jewelry is equally important for both comfort and aesthetics. Always opt for high-quality materials that suit your style while ensuring safety.

Remember to follow the aftercare instructions diligently to reduce risks of infection or complications. Embrace this trend with confidence as you create your own distinctive look with a forward helix piercing!

READ MORE:Showbizztoday.com showbizztoday: Gossip & Entertainment

Continue Reading
Click to comment

Leave a Reply

Your email address will not be published. Required fields are marked *

Fashion

Layered Haircuts: Best Styles & How to Pick Yours

Published

on

Layered Haircuts

A layered haircut is always in demand because they work. Whether one wants volume, texture, or just a soft frame around the face, well-thought-out work is something layers can offer to almost everyone.

This guide is a deep dive into what makes layered haircuts a classic at all times-from breezy long layers to bold short chops. Best hair cuts suited to different hair types and face shapes and different style preferences will be explored, along with several professional tips in selecting your best match.

What Is a Layered Haircuts?

Layered haircuts are techniques for cutting hair into varying lengths to give a look of volume, movement, and shape. Instead of blunt, uniform cuts, layered styles add some dimension and texture that give a dynamic and fuller look to the hair.

Characteristics:

Different lengths of hair.

Movement and texture.

Framing the face and neck.

Volume enhancement or thinning.

Whether grow them out or want something utterly manageable, layers will change your look.

Advantages of Layered Haircuts

Layered haircuts just carry a certain style, yet they are practically beneficial too; this explains why they are so loved:

Volume

    Perfect on thin or fine hair

    Illusion of thickness and movement

    Thins Down Very Thick Hair

      Removes excess bulk

      Makes really long, heavy hair much more manageable

      Emphasizes Natural Texture

        Works fabulously well with wavy or curly hair

        Gives definition without the frizz

        Versatile Styling

          Allow for natural means, curling, straightening, etc.

          Can be everything edgy, romantic, or classic

          Frame the Face

            To shine a spotlight on your best attributes

            Can soften assertive jawlines or emphasize cheekbones

            Most Requested Layered Haircuts

            Let’s now break down each most popular layered style for its different feels and lifestyles.

            Long Layers

              Craving movement but don’t want to sacrifice length? Long layers are perfect for you. These layers best suit medium-long to long hair, giving it a lovely soft and flowing silhouette.

              Style Suggestions:

              Pair it with some curtain bangs for an added bohemian feel.

              Looks fabulous with curls or loose beach waves.

              Short Layers

                These are the highest in bounce and volume for your hair. Ideal for chin-length bobs, pixie cuts, or shoulder-length hair that is looking flat.

                Pro Tip: Add some choppiness or piecey layers for a textured yet modern look.

                Face-Framing Layers

                  These are shorter pieces around the face that divert attention to the eyes, lips, or jaw. So very flattering and low commitment if you’re trying layers for the first time.

                  Perfect For: Enhancing Facial Structuring and Adding Softening

                  Shaggy Layers

                    Think extremely ’70s-rock star, with that messy, undone texture. Shag haircuts are back and in full force for big personalities.

                    Best For:

                    Wavy or curly textures

                    Thick or medium hair

                    Feathered Layers

                      Feathered layers are cut to flick away from the hair for an airy feel and were all the rage back with Farrah Fawcett. Think bouncy blowouts and hair that screams volume.

                      Layered Haircuts According to Hair Type

                      Most textures do play an important role in the appearance and behavior of layers. Hence, here are the specifics for the cut according to your hair type:

                      Straight Hair

                      Requires careful layering to avoid going limp

                      Request long, blended layers with volume toward the crown

                      Wavy Hair

                      Naturally holds shape—great for medium or shag layers

                      Avoid very short layers that could cause it to look frizzy

                      Curly Hair

                      Layers save the day from the perpetually displeasing triangle shape

                      Must be done by someone with experience in the cutting of curl patterns

                      Fine or Thin Hair

                      Light layering creates an illusion of body

                      Do not over-layer or it gets stringy.

                      Thick Hair

                      Layers remove bulk and provide shape to the hair.

                      Consider inside layering (those hidden layers) for beautiful movement.

                      Layered Haircuts According to Face Shape

                      The right layers can balance your features beautifully.

                      Oval Face

                      Lucky you! Most layered looks are good for you.

                      Try face-framing or curtain layers.

                      Round Face

                      Long layers that start below the chin would elongate your face.

                      Avoid short layers that only add width.

                      Square Face

                      Soft, wispy layers help to soften angular features.

                      Bonus: Side-swept bangs.

                      Heart-Shaped Face

                      Chin-length layers help balance weight from the forehead.

                      Try swooping layers and soft ends.

                      Long Face

                      Enhance width with horizontal layers and blunt ends.

                      Avoid long layers that extend down vertically.

                      Tips for Styling Layered Hair

                      Layered haircuts are quite easy to style whether you are looking for something sleek or tousled.

                      This is what you will need to love:

                      Round brush blowout

                      Paddle brush for getting that modern look in a pouf

                      Flat bristle again-raised curling iron or curling wand with small barrel

                      Texture sprays, filings, or dry shampoo lifts

                      Flat irons for piecey defined ends

                      Quick Ways to Style it Right Away:

                      Let air dry and leave-in conditioner for your natural wave

                      Velcro rollers for bounce

                      Scrunch with mousse for some ’90s attitude

                      Maintenance and Hair Treatment Tips

                      It is true that a layered hairstyle requires very less styling for daily basis, but it still requires frequent haircuts to look sharp and neat.

                      Must-knows for hair care:

                      Trim hairs every 6-8 weeks for the shape

                      Use heat protectant sprays during styling

                      A lightweight serum to define the layers and keep frizz to a minimum

                      Deep mask on a regular basis if you heat tools are used

                      Salon Tip: Bring reference photos and talk about your lifestyle-most likely, your stylist will customize layers for you.

                      Expert Opinions and Salon Advice

                      We asked stylists what they wished their clients knew more about layered cuts: “It is not one-size-fits-all; it’s layering that goes with blending into your lifestyle and texture.”
                      — Jen F., NYC-based stylist

                      “Fine hair should not have too many layers, but it can benefit a lot from a few layers in the front.”– Carlos D., salon owner, Los Angeles.

                      Don’t be afraid to discuss everything with the stylist. Communication = Yathasht haircut.

                      Conclusion: Should you get layered haircuts?

                      Layered haircuts are the most popular, flattering, and practical of all hairstyles available today. They have been tailored for different hair types, lifestyles, and individual flair: therefore, they cannot just be a passing fad.

                      Do you want to soften your look, add volume, or just change your entire style? Layers are always there for you to give an answer answers chic and personalized to your needs. The catch? Find a good stylist, tell them what you want, and then don’t be afraid to experiment.

                      FAQs (Frequently Asked Questions)

                      Q1: Are layered haircuts good for thin hair? Absolutely! Layers, when done properly, can add volume and movement. For the most part, long layers need to be applied to avoid giving an appearance to thinness.

                      Q2: How will I know if layers will suit me? Consider your hair texture, face shape, and styling routine. A stylist can personalize layers to flatter your features.

                      Q3: Are layered haircuts high maintenance? Not necessarily. Very regular trimmings are required for maintaining layers, but they are easier to style and tend to grow out quite gracefully.

                      Q4: Can I have layer cuts without losing length? Yes, definitely. Long layers today allow your hair to maintain the overall length while giving it that shape and movement.

                      Q5: How different are layers and thinning? Layers are used for a graduated contouring process that gives shape and volume. Thinning is the removal of a portion of the mass of hair without changing its length or the shape.

                      Continue Reading

                      Fashion

                      Finger Tattoos: Design Ideas, Pros, Cons & Care Tips

                      Published

                      on

                      Finger Tattoo

                      Finger tattoos, essentially, represent bold personalization and level, trendy cute. One can get a tiny minimalist symbol, matching couple ink or even a hidden meaning, but what makes finger tattoos different from other elements are their added personal meanings. Of course, stylish and attractive as they may be, one must consider certain important factors. This guide covers each of these considerations, from design inspiration to care tips, pain levels, and even upkeep procedures.

                      If you have decided to join the growing tribe of people having finger tattoos, this guide has all the resources you would require.

                      What Are Finger Tattoos?

                      Finger tattoos are tiny tattoos that can be placed on either the side, the tops, or even wrapped around the knuckles. Because of limited space, they present simple and minimalist designs, words, or symbols that can be really small.

                      Types of tattoos:

                      Top-of-the-finger tattoos, which are written on the part that is visible when the hand is resting.

                      Side tattoos, which can be called subtle and often hidden unless the fingers are spread.

                      A ring tattoo, which sits in the place where a wedding or promise ring would go.

                      Knuckle tattoos: Popular among extreme tattoo lovers, this typically has letters or even tiny symbols accompanying the boldness.

                      Finger tattoos have become quite popular today because of celebrities flaunting these unusual tattoos, such as Rihanna, Ariana Grande, and Zayn Malik.

                      Popular Finger Tattoo Designs

                      The design itself informs the meaning, the style, or both. Here are some trending designs for finger tattoos:

                      Minimalist Designs

                      Dots, triangles, arrows

                      Moon phases, stars, hearts

                      Initials or small numbers

                      Symbolistic Tattoos

                      Crosses, anchors, or even some other religious icons

                      Zodiac symbols or astrological signs

                      Infinity signs or yin-yang

                      Text or Lettering

                      Names, dates, or some shorter quotes

                      Roman numerals

                      “Love,” “Hope,” or even some custom mantras

                      Matching & Couple Tattoos

                      Lock and Key

                      King and Queen Chess Pieces

                      Coordinated initials

                      Pro tip: The simpler the design, the longer it would last, with least fading as compared to the more intricate designs.

                      Pros of Getting Finger Tattoos.

                      “What makes finger tattoos so popular?” you may inquire. Here are a few pretty solid reasons:

                      You Can Show ‘Em Off Every Day: Visibility.

                      Personal Meaning: Usually tied with very special memories or beliefs.

                      Minimalist: for more subtle inks.

                      Symbolic: Small but powerful- perfect-size commitment or memorial collection tattoos.

                      These tattoos go much deeper than just skin deep and are all about identity and sometimes even relationships or milestones.

                      Disadvantages and Challenges of Finger Tattoos to Consider

                      Finger tattoos indeed have an aesthetic appeal; however, they come with their corresponding challenges:

                      Fading/Blurring: It fades faster on the fingers than other parts of the body due to skin turnover.

                      Touch-Ups: Most finger tattoos require one or more touch-ups for re-inking.

                      Pain: The fingers can be painful places to tattoo, given thin flesh overlaid with numerous nerves.

                      Visibility in the Workplace: Not so many work environments take to visible ink.

                      Consider the long-term care required and the social implication before deciding.

                      Finger Tattoo Pain Level: What You Should Expect

                      Finger tattoos hurt-there is no other way around it. There is less skin here; the bones come quite close to the underside, resulting in a more intense style of experience as compared to say, the upper arm or thigh.

                      Pain levels (1-10):

                      Top of fingers: 6-7

                      Side of fingers: 7-8

                      Knuckle and cuticle: 8-9

                      Pain tolerance is for everybody to decide, but you can prepare. Hydrating, eating beforehand, and deep-breathing techniques throughout the session are all helpful.

                      Finger Tattoo Life Expectancy

                      This is one of the major concerns. Tattoos on fingers undergo fading:

                      With abrasion from washing, gripping, and typing

                      With blurriness due to ink diffusion into surrounding tissues

                      With ink loss during the healing phase

                      Finger tattoos can begin fading anywhere six months to one year, depending on skin type, the quality of ink, and lifestyle.

                      Ways to Help Finger Tattoos Last

                      Want to make your finger tattoo last longer? Here are a few pro tips:

                      Before Getting the Tattoo:

                      Choose an expert artist with experience with fine-line tattoos in small areas.

                      Go for easy designs that will age beautifully.

                      After Getting the Tattoo:

                      Make sure to keep it clean and hydrated.

                      Try not to keep it super long in water.

                      Don’t pick or scratch.

                      In the Long Term:

                      Use SPF to protect it from sun damage.

                      Get regular touch-ups.

                      Avoid repeated friction (like lots of scrubbing).

                      Finger Tattoo Aftercare: Instructions

                      Finger tattoos demand the strictest aftercare. The following is an easy way to go about the healing process:

                      Leave the bandage untouched for 2-4 hours after tattooing.

                      Wash it using antibacterial soap in lukewarm water.

                      Pat dry with a clean towel; do not rub it.

                      Apply a thin layer of tattoo ointment, such as Aquaphor.

                      Repeat the process 2-3 times daily in the first week.

                      During healing, swimming, hot tubs, and sun exposure should be avoided.

                      Healing could take about 10-14 days, but skin settlement could take longer.

                      How to Choose the Right Tattoo Artist

                      If there’s anybody responsible for ruining or carrying off a tattoo, it is the tattooist. Seek someone who:

                      Has healed finger tattoos in his portfolio;

                      Works with high-quality ink and equipment;

                      Adheres to the highest hygiene practices;

                      Tells you the truth about limitations in design and fading expectations.

                      Read online reviews, ask friends or visit the parlors and compare.

                      Finger Tattoos in the Workplace: Professionalism and Perception

                      Despite acceptance of tattoos into modern life, visible tattoos-whether they be on the fingers or hands-are still frowned upon in certain segments of the industry, especially finance, education, or law.

                      Here are some pointers to consider.

                      Which of these is applicable to your environment: creative, corporate, or conservative?

                      Such as side-of-the-finger, or micro tattoos, they are easier to keep sneaky.

                      Try henna or washes to give it a go without it being a commitment.

                      While some corporations promote body art, others would expect an employee to have exposed tattoos covered. Be aware when your career is still budding.

                      The Real Stories Behind Why They Get Finger Tattoos

                      Most finger tattoos have some strong emotional or symbolic meaning behind them, such as:

                      A widow chose a ring tattoo as a memorial for her dead husband.

                      A couple had sewn into the same fingers the coordinates of their first meeting.

                      An anxiety survivor had the word “breathe” to remind him of his victory over his anxiety.

                      Such stories remind us that tattoos are not fashion but represent identity, memory, and healing.

                      Conclusion: Should You Get a Finger Tattoo?

                      Finger tattoos are small, expressive, and intensely personal. They are well suited for those who want minimalist art, but prefer it with a little symbol. But they do deteriorate quicker, hurt more, and take some work to maintain.

                      Then, before being inked:

                      Find a good artist.

                      Choose simple designs.

                      Prepare for touch-ups.

                      Then, if you’re up to it, finger tattoos can very well rank with the best body art-out-of-sight, in-your-face, and always meaningful.

                      Frequently Asked Questions (FAQ)

                      Pay Off Of Finger Tattoo?

                      Yes, if you are dedicated to the upkeep and aware of the fading risk. Worthwhile, and stylish, but in maintenance.

                      How often will I need to touch up my tattoo?

                      Most tattoos need a touch-up within 6–12 months; some may be required annually.

                      Is this tattoo more painful than a regular tattoo?

                      Generally, yes. More nerve endings with less fat padding make them more sensitive.

                      Do some tattoo styles work better on fingers than others?

                      Yes. Bold lines and simple shapes tend to hold better than detailed or shaded designs.

                      Can I erase a finger tattoo?

                      Yes, using laser removal. Finger tattoos are, however, very stubborn and require several sessions.

                      Continue Reading

                      Fashion

                      Chic Pixie Haircuts: Bold, Modern Styles for Every Face

                      Published

                      on

                      Pixie Haircuts

                      During the previous years, pixie haircuts have proven their existence. They definitely show a sharp confident edge, laid-back style, and stand in stark contrast to traditional longer hairs. However, pixie haircut history is more than just walking into a salon and asking for a haircut. They are extraordinarily versatile cuts, from color trends to the look and shape of the face.

                      In this article, you will find every information about pixie haircuts that one can ever need, whether preparing to chop off their long locks or just wanting to refresh their already short style.

                      What Is a Pixie Haircut?

                      The Pixie haircut is a short hairstyle that is usually closely cropped on the sides and back, along with longer layers on top. It’s fashionable and contemporary, serving from edgy to even elegant, depending on how it is styled. Surprisingly, despite being short, it goes pretty well with different personas and lifestyles.

                      Notable Characteristics:

                      Short sides and back

                      Layered, Textured top

                      Bangs or fringe (optional)

                      Usually tapered at the nape

                      The pixie can go from practically shaved to layered or have bangs and swept to the side for a more feminine effect.

                      Somewhat in the 1950s, the comparatively earliest cultural genesis of pixie cuts occurred with Audrey Hepburn wearing the look in Roman Holiday.

                      From then onwards, it pretty much secured its title as a hairstyle with heavy charm in the 1960s, when Twiggy and Mia Farrow truly brought their short gamine looks and thereby redefined feminine beauty standards.

                      Then the trend rolled on in the early 2000s and onwards with stars like Halle Berry, Rihanna, and Anne Hathaway, proving that pixie haircuts will forever remain versatile and timeless in different eras.

                      Why Would I Go for a Pixie Cut?

                      Thinking of going short? Here is why a pixie haircut might be your perfect match:

                      Low Maintenance:

                      Minimal daily styling once a quick tussle or application of product is done — and you are good to go.

                      Good for Damaged Hair:

                      Getting rid of split ends and damage from color or heat gives your hair that healthy fresh start.

                      A Statement in Style:

                      A pixie cut does speak volumes of confidence and individuality. It shines facial features and personal style in a way few other cuts can.

                      Saves on Time:

                      You are taking a lifetime shortcut to drying and styling, which comes in handy for busy mornings or travel.

                      Reduces Product Use:

                      Your shampoo and conditioner, as well as hair-care products, will last longer because you will need less.

                      Best Pixie Haircuts for Different Face Shapes

                      Not all pixie cuts are created equal. What works best for you depends on your particular face shape:

                      Oval Face

                      Lucky you! Most pixie styles work well. Typically, a classic pixie with longer bangs or layers is suggested.

                      Round Face

                      As a general rule, select a pixie cut that has some volume on top and an asymmetrical attitude to help elongate the features.

                      Square Face

                      To soften those angular features, opt for side-swept bangs or textured layers.

                      Heart-Shaped Face

                      To balance a narrow chin, wear a layered pixie with fringe that falls across the forehead.

                      Long Face

                      Leave some length on top and cowlicks to keep volume at the front.

                      Styling Tips and Product Recommendations

                      Pixie haircuts are quite short though they are popular and hold a lot of styling options – edgy, sleek, tousled, or classic.

                      Most Used Styling Techniques:

                      Tousled Texture: For a messy-chic finish, use texturizing spray or dry wax.

                      Slicked Back: For a more polished evening style, apply pomade or gel.

                      Curly Pixie: Use curl cream or mousse to define curls with a soft, natural texture.

                      Side-Swept Bangs: Blow-dry with a round brush for subtle lift.

                      Must-Have Products:

                      Texturizing Paste: Adds definition and hold with no stiffness.

                      Dry Shampoo: Extends style between washes with added volume.

                      Shine Serum: Keeps hair looking glossy and healthy.

                      Pro Tip: The lightness of the formulas will not weigh down your short layers.

                      Color Trends with Pixie Haircuts

                      The pixie would lend itself extremely well to bright or multi-toned hair. Changes of color often come at reduced expense or with less damage to the hair of a person with short hairstyles.

                      What’s Hot for Hair Colors?:

                      1. Platinum blonde
                      2. Icy silver or gray
                      3. Jet black with a gloss finish
                      4. Pastel (lavender, rose gold, peach)
                      5. Balayage or two-tone looks

                      A good color can change an ordinary pixie into a fashion statement.

                      Celebrities Who Know How to Sport Pixie Haircuts

                      Celebrities always set the pace for beauty trends, and this is to say that they are also most of the time the trendsetters for pixie cuts.

                      Top Pixie Icons:

                      Charlize Theron- Sophisticated platinum pixie with elegant touches.

                      Zendaya- Looking sleek and retro-inspired on the short styles.

                      Emma Watson- Her 2010 pixie marked a major style evolution.

                      Scarlett Johansson- Edgy undercut pixie that turned heads.

                      Halle Berry- Arguably the queen of pixie cuts, mixing softness with attitude.

                      These A-listers just prove that pixie hairstyles can be glamorous and powerful without ever being boring.

                      Maintenance and Growing It Out

                      Another aspect of pixie cuts is that they require regular trimming to keep their shape and style. Usually, they are trimmed every 4-6 weeks. But what if you decide to grow it out?

                      Tips for Growing Out a Pixie:

                      Add Layers: Transition without those awkward stages.

                      Accessorize: Headbands, clips, or scarves will keep it stylish.

                      Keep the Appointment With the Stylist: No skipping on those trims — keeping control over the shape.

                      Consider a Bob or Lob Transition: A great mid-point moving you from the short to longer styles.

                      It certainly may not be a headache growing out a pixie hairstyle — in fact, with the right strategy, it’s fun!

                      Common Myths about Pixie Haircuts

                      Several myths are out there concerning pixie hairstyles. Let’s bust some now.

                      “Not a feminine haircut.”

                      Pixie hairstyles can be quite feminine especially when done with some soft makeup or accessories.

                      “You need to have perfect bone structure.”

                      What one needs more are the confidence than those cheekbones. Pixies do look good on many face shapes with simple customization.

                      “Limited styling options.”

                      Pixies can be curled, slicked, spiked, or swept in numerous ways.

                      Expert Opinions and Testimonials Based on Practical Experiences

                      Stylist Quote:

                      “A pixie is more than a cute and delectable hairstyle. It is a statement unto itself. Talking to the world that you are confident, edgy, and effortlessly chic.” – by Jamie Liu, an NYC-based hairstylist

                      Real User Review:

                      “I have always been scared of getting shortest layers, but I believe cutting it into a pixie has changed that. Feels more real than ever!” – Maria G., Chicago.

                      There is more pixie haircut inspiration from social media platforms, hashtags like #pixiecutinspo, #shorthairdontcare, and #pixiestyle.

                      Final Thoughts

                      Pixie cuts are more than a new interest in hair styling; they are a greater lifestyle choice that is bold and beautiful because it takes a leap of faith into individuality and confidence. Whether you are looking for a dramatic change or something new and updated but still fresh, this cut offers nearly limitless opportunities for personal taste.

                      From sharp edgy undercuts to soft, sweet feminine layers, pixies are unexpectedly versatile, truly chic across the globe, and always eye-catching.

                      FAQs

                      How frequently do you have to progressively go for trims with a pixie haircuts?

                      You should go to the salon or barber every 4 to 6 weeks to keep an edge on the style and a fresh look.

                      Will a pixie haircut be all right for fine hair?

                      Definitely! With the right layering, it can add volume and dimension to fine hair.

                      Can I style my pixie haircut with perfect curls or even when I have textured hair?

                      Sure. Curly pixies are in vogue, and they’re usually heat-free.

                      Is it hard to maintain a pixie hairstyle?

                      It is easily styled daily, but the shape will need maintenance with regular haircuts.

                      Will I be able to wear a pixie haircut with my face shape?

                      There’s a pixie for everyone; no face is left out.ly pixies are stylish and require minimal heat styling.

                      Continue Reading

                      Trending