Education
Easy Guide to Convert 22 C to Fahrenheit: Formula & Tips

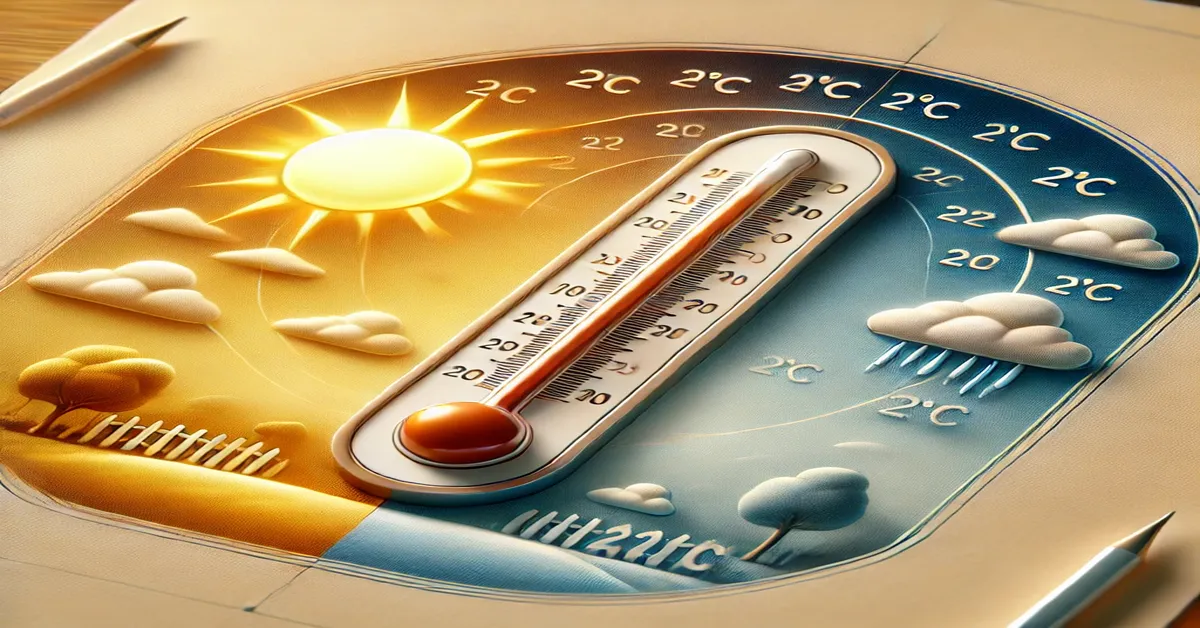
Understanding temperature can sometimes feel like deciphering a secret code. Whether you’re planning your vacation, cooking a delicious meal, or simply checking the weather, knowing how to convert temperatures is essential. One common conversion that pops up frequently is from Celsius to Fahrenheit. For instance, if you’ve ever found yourself wondering what 22 C to Fahrenheit, you’re not alone! This blog post will guide you through the process of converting this temperature easily and effectively. Let’s unlock the mysteries of temperature together and make conversions as simple as possible!
Understanding Temperature Conversion 22 C to Fahrenheit
Temperature plays a crucial role in our daily lives. Whether you’re checking the forecast or cooking your favorite dish, understanding how to convert between Celsius and Fahrenheit is invaluable.
Celsius, commonly used around the world, is based on the freezing and boiling points of water. It’s often favored for its straightforwardness. On the other hand, Fahrenheit is primarily used in countries like the United States. This difference can lead to confusion when trying to communicate temperatures.
When converting 22 C to Fahrenheit, there’s a simple formula you can use: multiply by 9/5 and then add 32. While that may sound complex at first glance, it becomes easy with practice.
So let’s break it down step-by-step! First, take 22 and multiply it by 9/5, which equals 39.6. Next, add 32 to this result. When you do that math—39.6 + 32—you arrive at approximately 71.6 degrees Fahrenheit.
Now you know that a temperature of 22 degrees Celsius equates roughly to 71.6 degrees Fahrenheit! This conversion not only helps bridge gaps between different measurement systems but also enhances your understanding of global weather patterns.
Feeling more confident about temperature conversions? You should be! With just a little practice using these formulas and methods, turning Celsius into Fahrenheit will feel effortless.
Introduction
Temperature affects our daily lives in numerous ways. Whether we are dressing for the weather or planning outdoor activities, understanding temperature conversions becomes essential. Among the various scales used worldwide, Celsius and Fahrenheit are two of the most common.
For those living in regions that primarily use Celsius, like much of Europe and Asia, converting to Fahrenheit can be a bit confusing. This is particularly true when you encounter specific temperatures frequently referenced in everyday conversations or media reports.
Take 22 degrees Celsius as an example. You might hear it mentioned during weather forecasts or while discussing climate conditions abroad. But translating this figure into Fahrenheit isn’t always straightforward without a reliable method at your fingertips.
Fortunately, there’s no need to feel overwhelmed by these changes in temperature measurements. Understanding how to convert between these two units is simpler than many people think. With just a few calculations, anyone can easily grasp what 22 degrees Celsius translates to on the Fahrenheit scale.
In this article, we’ll break down everything you need to know about converting Celsius to Fahrenheit effectively and efficiently. We will arm you with practical tools and tips so that you’ll never miss out again when someone mentions temperatures across different measurement systems.
Stay tuned as we dive deeper into the conversion process and provide helpful resources along the way!
Celsius to Fahrenheit Conversion
Temperature scales can be a bit confusing, especially when switching between Celsius and Fahrenheit. Understanding these two systems is essential for anyone navigating temperature-related discussions or activities.
Celsius, often used in most countries around the world, measures temperatures based on the freezing and boiling points of water. Zero degrees Celsius marks the point where water freezes, while 100 degrees Celsius represents its boiling point at sea level.
On the other hand, Fahrenheit is primarily used in a few countries like the United States. In this scale, water freezes at 32 degrees and boils at 212 degrees. This difference can make conversions feel tricky but manageable with some practice.
To convert from Celsius to Fahrenheit accurately, you can use a simple formula: multiply by 1.8 (or nine-fifths) and then add 32. So if you’re looking to convert 22 C to Fahrenheit, you’ll start by multiplying that number by 1.8.
This calculation gives you an intermediate result before adding 32 to get your final answer. The ease of using this formula helps ensure accurate conversions without needing complicated tools or devices.
For those who prefer visual aids over calculations alone, conversion tables are readily available online or in textbooks—offering quick references for various temperatures across both scales.
How to Convert Celsius to Fahrenheit
Converting 22 C to Fahrenheit is a straightforward process. To start, you need the temperature in Celsius. For our example, we’ll use 22 degrees Celsius.
Next, remember the formula: Multiply the Celsius temperature by 9/5. This step converts it into a fraction of Fahrenheit degrees.
So for 22 degrees Celsius, multiply it like this: 22 x 9/5. If you calculate that out, you get approximately 39.6.
Now comes the next part of the formula; add 32 to your result from before. This adjustment shifts your figure into Fahrenheit’s scale.
Continuing with our calculation: take that approximate result of 39.6 and add 32 to it. That gives us around 71.6 degrees Fahrenheit.
And there you have it! The conversion from 22 C to Fahrenheit can be done quickly using this simple method without any complicated tools or apps needed.
Celsius to Fahrenheit Conversion Table
When it comes to temperature conversion, having a Celsius to Fahrenheit conversion table is incredibly helpful. It offers quick reference points for common temperatures without needing calculations. This can save you time and effort during cooking or while planning outdoor activities.
For instance, water freezes at 0 degrees Celsius, which translates to 32 degrees Fahrenheit. This basic fact is essential in many everyday situations. Knowing the freezing point helps when dealing with weather forecasts or preparing food.
As you move up the scale, things start getting interesting. At 10 degrees Celsius, you’re looking at about 50 degrees Fahrenheit. A comfortable room temperature of around 20 degrees Celsius corresponds to approximately 68 degrees Fahrenheit—perfect for cozy indoor gatherings.
Once you reach a warm day around 25 degrees Celsius, it equals roughly 77 degrees Fahrenheit. This temperature often feels pleasant for most people and ideal for outdoor events like picnics or sports games.
On hotter days, say at 30 degrees Celsius (86 °F), you’ll notice the difference significantly as energy levels shift outdoors under that sun!
Extreme heat scenarios come into play at higher values like boiling water’s point—100 °C becomes an impressive leap to about 212 °F! These reference points allow anyone curious about weather conditions or culinary needs easy access without complex math involved.
Resources for Further Assistance
If you’re looking to dive deeper into temperature conversions, there are plenty of resources available. Websites dedicated to science and education often provide conversion calculators that can be handy for quick results.
You might also consider apps specifically designed for unit conversions. These applications can simplify your life by allowing you to convert Celsius to Fahrenheit and other units on the go. They usually have user-friendly interfaces, making it easy even for beginners.
Books about physics or chemistry often include sections on temperature measurement and conversion methods. A well-structured textbook can give you a thorough understanding of why these conversions matter in real-world scenarios.
Online forums and communities are great places to ask questions if you’re feeling stuck. Platforms like Reddit have threads focused on math and science where members share tips, tools, and personal experiences related to temperature calculations.
YouTube is another fantastic resource filled with tutorials that explain how temperatures work across different scales. Visual aids can enhance your understanding significantly, especially through practical examples.
Don’t forget about educational websites such as Khan Academy or Coursera! They offer free courses that cover various scientific principles including thermodynamics which will broaden your grasp on concepts like Celsius and Fahrenheit conversions.
Conclusion
Understanding the conversion of temperature can greatly enhance your daily life. When you need to convert 22 C to Fahrenheit, it’s a simple calculation that opens up a world of understanding about weather forecasts and cooking recipes.
Using the formula we discussed, 22°C translates neatly into 71.6°F, making it easy to grasp just how warm or cool the temperature really is in different settings. Whether you’re planning a picnic, adjusting your thermostat, or traveling abroad, knowing how to make this conversion will come in handy.
Additionally, utilizing tools like Celsius to Fahrenheit conversion tables can simplify your efforts further. Bookmarking reliable resources ensures you have quick access whenever temperatures are mentioned in Celsius.
Temperature conversions don’t have to be daunting anymore. With practice and these helpful tips at hand for converting values like 22 C to Fahrenheit easily becomes second nature. Understanding these basics equips you with knowledge that enhances comfort and preparedness in any environment you find yourself in.
Education
Convert 8mm to Inches Easily with Real-Life Examples

Have you been in situations where you are faced with the measure 8mm and wonder what this is going to be in inches? This situation is, of course, calamitically rare, but generally useful, especially if, now and then, you convert for a DIY project, shopping online, or when comparing parts. This article will merely guide you on the conversion of 8mm to inches in the most straightforward and accurate manner without going into a lot of mathematical details.
What Is 8mm in Inches?
So, let’s get right into it with the answer for which you were searching:
8 millimeters (mm) = 0.31496 inches (in)
For practical use, this converts to 8mm about 0.315 inches.
This small but impinged conversion is relative to dozens of industries, including carpentry, construction, jewelry making, and photography.
Formula-The Conversion from 8mm to Inches
If you’re converting 8mm to inches in a very manual way, this would be a pretty simple one:
Formula:
Inches = Millimeters ÷ 25.4
So, applying this to 8mm:
8 ÷ 25.4 = 0.31496 in
When it comes to using this formula, feel free to use it for any value in millimeters that you like to convert to inches.
Example of Long-Tail Keyword:
For those asking, “How many inches is 8mm exactly?”—the answer is 0.31496 inches.
Millimeter to Inch Conversion Chart
Here’s a handy reference chart for converting millimeters to inches:
Millimeters (mm) | Inches (in) |
---|---|
1 mm | 0.0394 in |
2 mm | 0.0787 in |
5 mm | 0.1969 in |
8 mm | 0.315 in |
10 mm | 0.3937 in |
20 mm | 0.7874 in |
25.4 mm | 1.0000 in |
50 mm | 1.9685 in |
100 mm | 3.9370 in |
Why You May Want to Convert 8mm to Inches
When both metric and imperial systems coexist on the Earth, conversions become important. 8mm to inches will indeed be valuable in the following:
Purchases over the Internet: Buying parts from Europe or Asia which have their metric specifications.
Crafts: Using tools or materials measured in inches.
Designing and 3D printing: Applying specifications across different unit systems.
Scholarship Purposes: Solving science or math problems.
Manufacture and Engineering: Dimensions of parts, screws, or tubing.
Understanding these measurements would save you money, time, and, above all, havoc since it may not be applied when accuracy is questioned.
Common Use Cases for 8mm to Inches Conversion
And here are a few such examples:
1. Jewelry Design
Jewlery uses with a common size of beads like the 8mm bead are used in the making of bracelets. Knowing that this is just slightly above about 0.315 inches, you can now match according to their imperial sizes.
2. Screws and Bolts
An 8mm screw would be the requirement for a particular machine, however, if the supplier has only imperial sizes, converting that number to its equivalent in inches would now be essential to avoid errors.
3. Home Improvements
It’s quite likely that drilling, plumbing, or fittings applications will require fine conversion for a snug fit and safety.
4. Photography
Most lenses, filters, and mounts will indicate their thread or mount size in millimeters; knowing what that is in inches makes for easier application cross-platform compatibility.
Tools for Converting 8mm to Inches
Are you not so good in math? Not a problem! Here are some reliable tools to help you out.
Online Converters
Google Search: Type in “8mm to inches” and get instant results.
UnitConverters.net: Conversion is fast and accurate.
RapidTables.com: You can use this site for larger bulk value conversion.
Apps
Convert Units App (for iOS/Android): This is designed for fieldwork and students.
Engineering Toolbox App: This is best-suited for use by engineers and architects.
Smart Assistants
You may ask Alexa, Siri, or Google Assistant:
“Hey Google, how many inches is 8 millimeters?”
Response: “8 millimeters is equal to 0.315 inches.”
Some Tips about Working With the Metric and Imperial Systems
Nothing great about mixing the two, isn’t it? Here’s how to make things simpler:
Stick to One System as Much as You Can: Avoid any chances of confusion with the measurements.
Label Your Tools: Label your tools using different colors in case you are using both systems.
Go for Digital Calipers: Most of these have a one-button conversion system between mm and inches.
Learn to Estimate: Common estimations such as 10mm ≈ 0.4 inch will serve you well.
Real-Life Examples of 8mm Measurements
Concerning the 8mm to inches conversion, some visibility would be given by some objects which are approximately 8mm wide:
The lead thickness of joint pencils.
Two nickels on top of each other.
Width of a wedding band average in size.
Thickness of an average case for an iPhone.
Beads for mala or charm bracelet.
Imagining the above will help understand how small or big can be 8mm in daily life measurements.
Conclusion
Converting 8mm to inches isn’t just a math exercise—it’s a practical skill that bridges two measurement worlds. Whether you’re shopping for parts, crafting, or working on a construction project, knowing that 8mm equals 0.315 inches gives you clarity and confidence.
In a world where precision matters, a small measurement like 8mm to inches can have a big impact. Use the tools, tips, and real-world examples in this guide to make accurate, informed decisions.
Call to Action
Enjoyed this guide? Bookmark it for quick reference, share it with friends who love DIY, or leave a comment below with your own 8mm-to-inch challenges!
Frequently Asked Questions
Is 8mm the same as 5/16 inch?
Almost! 5/16 inch equals 0.3125 inches, while 8mm is 0.31496 inches. They’re very close, but not identical.
How do I convert mm to inches without a calculator?
You can use the ratio 1 inch = 25.4mm. So divide the millimeter value by 25.4.
Example:
8 ÷ 25.4 ≈ 0.315 inches
Can I use an 8mm drill bit instead of a 5/16 inch?
In many DIY situations, yes. But for precision projects or engineering, the slight difference could matter.
What is 8mm in fractional inches?
8mm is about 5/16 inches (more precisely: 0.31496 inches).
Why do countries use different measurement systems?
The metric system is globally standardized and used in science and most countries. The U.S. still uses the imperial system due to historical usage and regulation differences.
Need more conversion help? Check out our full [Metric to Imperial Conversion Guide] for deeper insights.
Education
Cute Easy Drawings for Beginners and All Ages

Are you searching for a fun and relaxing way to tap into your creative reserves? Well, cute easy drawings is just the starting place for you! It doesn’t matter if you’re an utter beginner or want quick doodles for relaxation, this guide will educate you in everything you’ll need to know.
From clearing the cobwebs with tool-usage and the techniques, adorable ideas, and tips, we’ve dragged together the advice from experts, and your sketchpad would never go dry. So let’s dive in!
Why Choose Cute Easy Drawings?
Cute easy drawings are enjoyable and serve as a creative gateway for all kinds of artsy people. This is what makes them so popular among wannabe artists:
Beginner Friendly: No previous experience need be necessary.
De-stressing: Drawing small animals or food with smiling faces? Total mood lifter.
Time Saving: Most doodles require less than 10 minutes.
Shareable: Great on social media or in journals.
Must-have Drawing Tools for Beginners
You don’t need high-end equipment; just a few of the essentials will do:
Sketchbook or Paper: Any kind will do-start simple.
Pencils: Mechanical or good old regular HB pencils.
Erasers: A kneaded eraser works best when you’re trying for light removal.
Fineliners or Ink Pens: For outlining and defining.
Coloring Tools: Colored pencils, markers, or watercolors.
Optional for Digital:
Tablet & Stylus: iPad + Apple Pencil or any drawing tablet.
Drawing apps: Procreate, Autodesk Sketchbook, or Adobe Fresco.
Simple Drawing Techniques to Know
Learn a few basics to make your drawings cleaner and cuter:
Shapes First
Most cute easy drawings begin with simple shapes—circles, ovals, rectangles. Practice seeing what you perceive and breaking it down into these forms.
Line Control
Make your things look kind of soft and friendly with smooth, curved lines. Try light pressure for sketching and heavier for final outlines.
Symmerty & Balance
Many kawaii (cute) styles rely on symmetrical features—like matching eyes or centered smiles.
20 Cute Easy Drawings Ideas (With Descriptions)
Drawing is very adaptable! You can even change all of these ideas or put your own spin on it!
Smiling Strawberry: Round shape, tiny seeds, and blushing cheeks.
Fat Cat: Big head, tiny paws, and a long tail.
Happy Cloud: Fluffy edges with a shy smile.
Sleeping Panda: Black and white contrast with closed eyes.
Cup of Jasmine Milk Tea: Pearls and a straw with a happy face.
Cute Ghost: Rounded bottom and soft arms floating around.
Tiny Dinosaur: Big eyes, little spikes, and short limbs.
Kawaii Doughnut: Icing, sprinkles, and a cute grin.
Sunglasses Sun: Circle with ray lines and an attitude.
Sleepy Koala: Hanging on a tree with closed eyes.
Smiling Avocado: The pit becomes a face!
Little Mermaid: Big eyes, a starfish hair clip, and wavy tail.
Kawaii Cactus: A tiny pot with a shy expression.
Baby Penguin: An oval body with flipper wings.
Heart Balloon: With the string twisted.
Ice Cream Cone: Swirled top, cherry, and a wink.
Star with a Wink: One eye shut and one open.
Tooth with a Bowtie: So fresh and so clean.
Mini Unicorn: Round body, pastel horn.
Book with Glasses: Nerdy and adorable.
Handy Tips for Adding Extra Cuteness to Your Drawings
Here are some ways to put cuteness into even the simplest of sketches:
Big Eyes: Bigger is cuter, and shiny is better.
Blush Marks: These are quick and will give a “cuteness” impression.
Round Features: No sharp lines! Sharp lines give a serious vibe. Round lines are all about friendship.
Expressions: You can try making them smile, sleepy, or wide-eyed with amazement.
Tiny Adds-On: You can embellish your doodle with a tiny bow or hat or decorate it with mini stars.
Digital Drawing and Traditional Drawing
Which one suits you?
Traditional
It has the touch and feel component.
Setting up is almost minimal.
Good for sketch journaling or handmade cards.
Digital
Unlimited redo.
Brushes and effects everywhere.
Perfect for animation or posting online.
They both offer something unique. Try both and see what feels right!
Transforming Magic Out of Done Doodles
Cute easy drawings can consider and other things. Here are some ways to transform drawings:
Wall Art: Frame your best drawings.
Stickers: Get printable sticker paper.
Greeting Cards: Customize them for holidays or birthdays.
Digital Products: Transform into icons or emotes.
Crafting It Yourself: Based on collaging, bookmark-making, or resin charms.
Where to Find Inspiration for Cute Easy Drawings
Stuck for ideas? Try any of the following:
Pinterest & Instagram: Excellent for trends and inspirations.
Drawing Prompt Generators: There are many of them online; browse for the one that best suits you.
Nature: Animals, plants, and landscapes can be, to various views, incredibly charming.
Cartoons: Such as Sanrio, Studio Ghibli, or Pokémon.
Ordinary Objects: Give faces to cups, pencils, or pillows.
Beginning Mistakes to Avoid
Even the simplest forms of cute easy drawings can easily go wrong if you commit some of the following common mistakes:
Overly Complicated Details- Keep it simple!
Do away with the guidelines: Basic shapes help to form your work.
Without Using References- Visual cues improve accuracy.
Being Too Self-Critical- Art is for practice, not perfection.
Conclusion
Cute easy drawings are a real joy to create as well as to show-off to others. A few tools and a spark of imagination can really let one fill one’s world with arts that make broad smiles and bring one peace inside.
Start with a strawberry then a sleeping panda and who knows? Your inner artist inevitably might shine out.along the way.
Frequently Asked Questions (FAQs)
Q1: What are some good materials for kids learning cute easy drawings?
A: Start with colored pencils, non-toxic markers, and a sketchpad. Keep it simple and safe.
Q2: Can I sell my cute easy drawings online?
A: Yes! You can turn them into digital downloads, stickers, or merchandise—just make sure they’re original.
Q3: How can I improve my drawing style?
A: Practice consistently, study your favorite artists, and try drawing the same object in different ways.
Q4: How long does it take to get good at drawing?
A: It varies. With daily practice, you’ll notice big improvements in 1-2 months.
Q5: What apps are best for drawing cute art?
A: Procreate, Clip Studio Paint, and Ibis Paint X are excellent choices for beginners and pros alike.
Ready to start drawing? Grab your sketchbook and let the cuteness flow!
Education
12mm to Inches – Exact Conversion & Practical Guide

Metric to imperial conversions must be understood in great detail in various fields such as construction, engineering, manufacturing, and simply in practical terms. One instance of conversion often researched is 12mm to inches. Our guide will present a more precise conversion formula with examples, including possible applied use of this measurement.
Understanding the 12mm to Inches Conversion
Millimeters (mm) and inches (in) are different units of length measurement. The millimeters are part of the metric system that is commonly used the world over, whereas the inches belong to the imperial system, which is more common in the U.S. and a few other places.
Here is a quick answer to the question: A 12 mm measurement translates into about 0.472 inches.
The formula for converting millimeters into inches is stated below:
Example Calculation
12 mm in inches can thus be calculated as follows:
Thus, 12 mm ≈ 0.472 inches (to three significant figures).
12mm to Inches Conversion Table
For easy reference, here’s a quick conversion chart:
Millimeters (mm) | Inches (in) |
---|---|
1mm | 0.0394 |
5mm | 0.1969 |
10mm | 0.3937 |
12mm | 0.4724 |
15mm | 0.5906 |
20mm | 0.7874 |
25mm | 0.9843 |
30mm | 1.1811 |
This table helps in quickly finding the equivalent inch measurements for different millimeter values.
Real-Life Application of the 12mm Measurements
Conversion of 12mm to inches proves to be useful in various situations in real life. Some of those scenarios are:
- Home Renovations/Remodeling and Construction
Floor and tiles: Tiles are often measured in terms of millimeter measurements. A 12mm thick tile, for example, refers to a tile which is around 0.47 inches in thickness.
Wood and plywood: In carpentry, most of the wood thicknesses are measured in millimeters. A sheet of plywood of 12mm in width is about 0.47 inches in thickness.
- Automotive Field
Sizes of bolt and nut: Metric measurements are common in most car parts and motorcycle spare parts. A 12mm bolt is the measure of a bolt’s diameter, which comes to under just 0.5 inches.
12mm thick: brake rotors and engine parts. Some of them, such as brake pads and gaskets, are 12mm thick.
- Fashion and Jewelry
Rings and bracelets: Several pieces of jewelry have a thickness of 12mm. That is equivalent to 0.47 inches, an approximate value.
Earring Gauges: Some stretched piercings use 12mm as a standard gauge size.
- Technology and Electronics
Laptops & devices: Laptops that are moderately thin as well as smartphones normally appear very close to 12mm in thickness.
Speaker and headphone drivers: Such types of audio devices feature 12mm driver components that will improve sound quality.
- Manufacturing & Engineering
Metal & plastic parts: 12mm is a conventional thickness for industrial applications of materials, including sheets of steel or acrylic sheets.
Others: A few pipes and hoses can also be found with a diameter of 12mm in plumbing and hydraulic systems.
Conclusion: The Importance of Accurate Conversions
Conversion of 12mm to inches is fundamental in several industries, including home improvement. Knowing how to convert 12mm to inches is essential in various industries, from home improvement to technology. Understanding these conversions ensures accuracy in measurements, purchases, and DIY projects.
Frequently Asked Questions (FAQs)
1. Is 12mm exactly 0.5 inches?
No, 12mm is approximately 0.472 inches, not exactly 0.5 inches.
2. How do I convert 12mm to inches without a calculator?
You can estimate the conversion by remembering that 1mm ≈ 0.04 inches, so 12mm ≈ 0.48 inches (rounded estimate).
3. Can I round 12mm to 0.5 inches?
For rough estimations, yes, but for precise measurements, use 0.472 inches.
4. Why is millimeters to inches conversion important?
Many industries use different measurement systems, so understanding conversions helps in manufacturing, construction, engineering, and everyday use.
5. Is 12mm thick for a phone or laptop?
Yes, a 12mm laptop would be considered thin and sleek, while for a phone, it would be on the thicker side.
- Entertainment4 weeks ago
25 Best Family Movies to Watch Together (2025)
- Business3 months ago
5starsstocks.com Dividend Stocks: Investing with AI Insights
- Lifestyle4 months ago
The //vital-mag.net Blog: A Guide to Holistic Wellness
- Entertainment3 months ago
Showbizztoday.com showbizztoday: Gossip & Entertainment
- Business3 months ago
FintechZoom.com Gold: Gold Investment with Modern Tools
- Business3 months ago
5StarsStocks.com: Guide to Smart and Strategic Investing
- Lifestyle2 months ago
Best Disposable Vapes: Flavors, Longevity & Trusted Brands
- News3 months ago
Kennedy Funding Ripoff Report: Insights into Private Lending